Showing posts with label Gifts. Show all posts

Saturday, April 10, 2010

Happy Saturday to you!

Hey there - welcome back! I have a few new cards and a project to share with you today.

First up is this card I created using Wimpychompers Creations' You Make Me Bananas kit and a border from Britt-ish Designs' Doodlie-Do Page Borders (which I use ALL the time on my projects!!!!)


Next up is another card I created using a new technique that I found in the resource section at Splitcoast Stampers - creating a brick wall. I used ViVa Artistry's Altered: Stoked kit.


This card made it to the Gallery Standouts site - which is indeed an honor!!!

My box of cards that I am making (and collecting at card swaps at my monthly Stampin' Up! card club) is filling up FAST this year!!!

One last project that I have to share with you today is this one - which at first I didn't like how it turned out. But the more I see the photo, the more I like it!


Don't you just love how girly it looks with the maribou?

Tip: use a low temp hot glue gun to attach the maribou to your projects.

Credits for this project are Simply J Studio Fry Box Template and Sya Blueprints and Juno Designs collab A Different Kind of Love

Well, that's it for me on the sunny warm Saturday in PA - it's almost time for the Hockey game! Go Pens!!!

Monday, March 29, 2010

3/29 It's a Blog Hop featuring Kelleigh Ratzlaff Designs!

Oh my....has it really been 4 1/2 months since my last blog post? Yepp...it sure has. What better way to get back into blogging than to join in on a blog hop!!!

Kelleigh Ratzlaff's Creative Team at The Digichick is having a hop (appropriate for this time of the year huh? LOL). There are 22 extremely creative artists joining in on the fun!

One lucky hopper (that's you!) will win a $10 gift certificate to Kelleigh's store just for commenting on her blog post with your vote for your favorite Creative Team project from the hop. One lucky Creative Team member will win $10 in PayPal cash for earning the most votes!! The Blog Hop contest winners will be announced on Thursday, April 8th on Kelleigh's blog.

So, what did I make? Well, one of my favorite things to do is to take a template and "do it" differently than it was intended. Earlier this month on The Hybrid Chick, I turned Kelleigh’s Heart Purse template into a Bridal shower/wedding favor. Make sure you check it out! Almost makes me wish I was getting married again.....almost!!!!

So for Kelleigh's blog hop, I decided to use her Take-Out box template.


I also used Lil Dude by Jennifer Fox, Nikki Epperson, and Melissa Bennett to create my project. I just love the papers in this collab!!!


and here is what I created:


and yes, that really is Kelleigh's Take-Out Box template!!! Wanna know how I made this using that template?

First I opened Kelleigh's large sized Take-Out Box template. I worked with the "lines only" layer - hide or delete all other layers. Next I erased the lines that would create the top flaps of the box. Then I rotated the lines layer on the canvas and enlarged it until it was as wide as my canvas. I copy and pasted the lines only layer onto my patterned paper. I changed to color of my score lines to white by adding a new layer over top of the lines, flood filling the new layer with white and then hitting "control + G" to clip the white to my score lines.

Next, I printed a full 8.5 x 11 sheet (borderless) of the green paper from the kit on Epson Matte Double Sided Presentation Paper. Then I turned the presentation paper over and printed a full sheet (borderless) of the patterned paper along with the lines of Kelleigh's template that I changed as above.

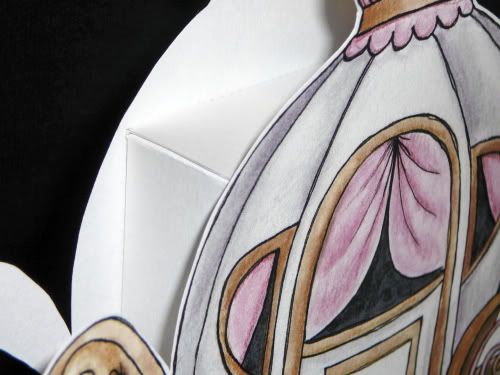
After cutting around the edges of my template, I scored all of my dashed lines and creased my scores. The triangular shaped pieces of the template were scored and folded inward instead of outward. On a regular take-out box, the pieces fold outward and then are folded against the outside of the box. This is what it will look like scored and ready to assemble:


Next, I made a faint pencil mark along the fold of each of the triangular shaped pieces and then used my crop-o-dile to punch the holes.


See above photo to see where I positioned the holes on the template.

Next I took one end of some embroidery thread and threaded it through the holes the whole way around twice ending in the same space I began.


After pulling the strings to form my basket, I tied a knot and snipped the loose ends of the thread close to the knot.


To create the handle, I cut a narrow strip of coordinating paper the length I wanted my handle to be. On both ends of my handle, I folded approx. 1/2 inch to the underside. I then punched holes at each end of the handle for the brads.


Positioning the handle on the tightened embroidery floss in the center of the basket, I added the brads to secure the handle in place. Repeat on opposite side.


To finish my project, I decorated the sides of my box/basket and the handle.


And that's my project for the blog hop! Make sure you check out all the stops on the Blog Hop (just keep in mind that those participating are all over the world and in different time zones so be patient and check back later in the day if a post on the list isn't up!)

Here are your Blog Hop Stops:
Kelleigh
Tracy
Sally
Laura
Juli
Julie
Christy
Dana
LuAnn <---You are here!
Jacinda
ViVa
Dalis
Holly
Sharyn
Karen Lewis
Linda
Alice
Mel
Sunghee
Carolina
Debbie
Kim

Don't forget to go back to Kelleigh's blog and leave a comment at the end of her Blog Hop post with your favorite Creative Team project for a chance to win a $10 gift certificate to Kelleigh's store.

Thanks for stopping by and hope you enjoy the hop!!

Thursday, June 11, 2009

*clearing out the cobwebs that are growing on my blog*

I think I've been avoiding my blog because I want to update it but I'm not sure how. I just need to sit and play around with the HTML and make it mine! *sigh* maybe someday.....

For the 6/4 Sweet Shoppe FOBTY we are to blog about our favorite animal at the zoo. Mine has to be the Giraffe! There's just something about them. I love the coloring and the pattern on them. and look out if I see a giraffe in a digital kit!!! I was at Joann Fabrics last week and saw THE cutest baby quilt fabric. it was already done up like a patchwork quilt with textured giraffes and frogs on it. Tomorrow's payday and I just have to go get that fabric to make a blanket. You never know when you need a baby gift! or maybe I'll just tuck it away for the future.....

For the 6/11 FOBTY, we were to take a What Taste are You? quiz. Here are my results:


You Are Bitter


You aren't bitter at the world, even though you have a strong personality.

Instead, you are sophisticated and cultured. You appreciate acquired tastes.


You are very powerful. You have the ability to change a room's energy.

While some may find you disagreeable, your points of view are intelligent and interesting.


Hahahaha.....bitter? LOL ok....I do have a strong personality. not online though. I tend to be kinda shy esp. around other strong personalities.

I have some recent projects to share and a few layouts but I need some sort of posting schedule because I am waaaaaaaaaaay behind and don't want to post them all.

I will post one of my most favorite projects ever.....a Carriage wedding favor box:


and a close up:


The digital Carriage element used for this project was designed by Kate Hadfield specifically for this project. Thank you Kate!!!
Instructions can be found in TDS archives

And my next to favorite recent project - a matchbox treasure chest created for The Hybrid Chick:


Instructions to make your own are posted on The Hybrid Chick

that's it for today - hopefully I'll be back in a few days with some more recent Layouts and projects!

Saturday, March 21, 2009

Hey there - long time no see!!

Dang! I can't believe it's been over a month since I last posted! I haven't had a whole lot of time for the computer - my Dad is still staying with us. He's here alone most of the day so I feel really guilty being on the computer in the evening. He's just about ready to move back home!! I'm so happy for him! It's been fun hanging out together in the evenings even if it's just watching TV or going to the park and walking the dog around the lake.

I have managed to get a few new projects done for some new positions. I've joined the Hybrid team at The Daily Scrapper and also joined the Hybrid Chick team. I can't post the projects that I've done for The Daily Scrapper until 30 days after the release of issue. I do have a few other things that I can share! Sadly, layout-wise - my mojo has gone bye-bye!

First off, a few weeks ago, Kate Hadfield gifted me with a certificate to her store at the Lilypad. Kate has THE best hand drawn doodled elements out there! Her unexpected gift came a few days after my Dad's surgery and on a day that he wasn't doing well! It was also a few days after.... shhhhh.... *whispering* my 40th birthday. So all in all, it was a rough week (not because of the birthday though - that wasn't bothering me at all).

So, I wanted to do something in return for her. So, what better way than to create something using her designs and give it back as a gift??? Now, unfortunately, I can't post the photo of what I created until she receives it because I don't want to spoil her surprise. But I do have a few sneak peeks that I've been teasing her with...


Aren't I being a stinker tormenting sweet Kate like this??? LOL...

I can tell you I am STOKED how it turned out and can't wait to get it in her hands! I am hoping to get it in the mail at the end of the week! And I hope she loves it as much as I do! I usually am VERY critical of anything I make and just LOVE how it all came together and turned out!

And on to some other things that I created in the past few weeks:

For the 3/18 Hybrid challenge at the Digichick - using Dawn Inskip and JanaM's new kit called Jungle Fever:


Doesn't it look like that lion is really RAWR'ing??? LOL

And for my blog post on the Hybrid Chick on 3-16-09 - using Starry Night by Megan Fisher:


I think that's it for today - I have a few other things in the works. Until then, thanks for stopping by!!!

Saturday, December 13, 2008

Hybrid Cocoa Pockets

Hi there! It's been a long time since my last post. I've been busy getting ready for the holidays (both Thanksgiving and Christmas). I can't believe christmas is in 12 days!!! I haven't even begun shopping for the kids. Hubby and I are going later this evening and will pretty much finish them in one night. But enough about that, I'm sure you're here to see what I've cooked up...


I came across these little cocoa holders while blog hopping. The idea and inspiration came from Barbara Schram's stamping blog here. Her cocoa packets are AMAZING!!! She was so very kind to post links to the instructions for the paper cup(which I will refer to as the pocket LOL). I think she must have used 12 x 12 sized papers - some were done with double sided papers too because her pockets were bigger than mine turned out.

So, I set about making a digital version and here's how I did mine.

In Photoshop, I opened 2 papers from Penny's Cocoa Mallow Stick kit - the brilliant blue called out to me so I chose it and then did color replacement to change the snowflake paper from neon green to a light blue color. I resized my papers to 8 x 8 and layered them on top of each other on a blank 8.5 x 11" 300dpi canvas.

Now here's where it was a bit tricky. I needed to print one of my 8x8 papers on each side of my white printer paper so that I ended up with a double sided square. I made one of my papers invisible for the first printing. Print on your printers best setting. Allow the ink to dry for a few minutes before you turn that page over and put it back in your paper tray to print on the other blank side. Make sure you feed the same end of the paper into the printer.

**As always, I recommend doing a test print using grayscale (to save ink) to make sure your squares line up back to back when printing. For some reason I had to move one paper just a smidge to one side in order for them to line up perfectly**

In your program, hide the paper layer you just printed and make the other paper layer visible. Print. If you hold your paper up to light, you will be able to see if your squares lined up. Allow ink to dry before handling and folding, otherwise you'll get fingerprints elsewhere on your pocket. *trust me on this!!! LOL)

Cut your square double sided paper. Follow the instrucions for making a paper pocket. (When I folded my points to the opposite side, I touched the point to the edge of the opposite side and then eyeballed the other side to make sure it was going to look right). Once I was happy with how it looked, I made my folds and creased them with my fingers tips.

I (like Barbara) folded my flaps to the outside of my pocket instead of tucking them
in. I used a glue dot under the edge of the diagonal fold and also under the point of the folded down pieces to hold my pocket together. Boo hoo - I was out of my Xyron tape runner!

Embellish as you desire. I used glue dots to adhere my embellishments. Add a packet of cocoa (or baggie of homemade cocoa), some mini marshmallows, and of course a spoon! If my pockets were bigger, I would have tossed some mini chocolate chips and/or some colorful sprinkles in baggies in there too! Jewelry bags would have made for a better presentation.

And here's one I did for a baby shower favor - add some shower mints and you're all set!


Wouldn't these be super cute to pass out for Valentine's day??? My daughter asked me if these were Chinese cups - as she knows how to fold paper to make these. So I'm thinking these would be a fun project to get the kids involved in!

I'd love to see your version of these - so drop me a line if you make some!!!

Tuesday, November 11, 2008

Hybrid Baby Shower Favor and Candy Bouquet

Just to back up a bit and give you a little story as to how this came to be...At the beginning of October someone posted on our local Freecycle site looking for any leftover baby shower favors, decorations, etc. Well, I couldn't let someone "collect" various favors for a special time in a new Mom's life, so I emailed the lady and offered to do all of the baby shower favors for her. Had no idea who the ladies were and have never met them. After a few emails about the size of the shower and themes, I went to work. I also offered to create 2 candy bouquets for her to use at the shower in any way she wanted.

Here is the Baby shower favor I created for her - I also wrapped about 25 shower mints in white netting and tucked them in the shoe.


I found the idea online, followed their instructions and then went about "fixing" the first one to look more like a shoe, including the area for the "laces"

The little hanging tag was created using Melissa Bennett's Bundle of Boy kit from the Sweet Shoppe, font is Darcy Baldwin's HeatherG, and saying on the tag says: Little hands, little feet, pure and precious, and oh so sweet!

Here is one of the candy bouquets I made - both were the same.


Credits can be found HERE

I'll be posting my instructions on the Candy bouquet on my blog this week for anyone that is interested!

That's it for today! See you again soon!

Thursday, October 16, 2008

Playing catch-up!

So, last posting I promised some new Hybrid projects I've done. It's been awhile since I've posted anything over here, so I have a few to show off.

First is my most favorite project so far! When I was digging through my stash box for the tattoo paper, I came across a few of my chick feeder bases that I had crafted with a few years ago. I added a new coat of paint and digitally created a label for the jar and PRESTO! I did this project for Hybrid Hump day over at Penny Springmann's blog. Isn't it purty??? LOL


I made the label using Penny Springmann's Boo to You 2008 kit

And I am absolutely stoked that my people feeder will be featured at The Daily Scrapper on 10-17-08!!!

Another project created for Penny's Team Hybrid project which we do monthly was this clock. The team used Shrinky Dinks for our projects - and wow...there were some great ideas! Check them out at this post over at Penny's blog.


I used Penny's Garage Grunge kit for this project - the wrench and screwdriver clock hands are my Shrinky Dinks!!! What guy wouldn't love this hanging in his garage or work area???

And lastly tonight, for the FOBTY challenge at SSD- Which Halloween candy are you:


Halloween Candy Quiz


Halloween Candy Quiz


You are a Pumpkin Jelly


Like the pumpkin jelly candy you are soft and gentle


Find out which Halloween Candy you are at Quizopolis.com


That's it for me for tonight! I have a few new projects in the works so stay tuned!! It's time to start thinking about Christmas gifts!

Sunday, October 12, 2008

I've been Neglectful!

It's a beautiful fall day here in PA. It's 80 degrees out and signs of fall are everywhere! The leaves are beautiful in their shades of green, yellow, orange and red. Once again, it's been a month since I posted. Not sure why I can't get back into regular posting?!? I've created some of my most favorite layouts this past month and also a few projects that I'll post over the next week. For now, I want to catch up on some of the Sweet Shoppe's From Our Blog To Yours challenges.

FOBTY 9/25 was a typing test. I think I type fairly well. I knew as my fingers hit the keys which words I misspelled - there were 3 of them. Here are my results:

71 words

Typing Test


Wanna give it a try? Typing Test

FOBTY 10/2/08: My favorite fast food has to be McDonalds. I used to eat there at least once a week (either for lunch at work or with the family) however, times are tough and I've been trying to eat healthier. I did have a double cheeseburger late last night (after having some beer while out LOL) but other than that, it's been probably atleast 6 weeks or more since I had McDonalds. I find the more I eat there, the more I crave it. Since I don't eat there regularly anymore, I don't crave it. Strange huh?

FOBTY 10/9/08: This week's FOBTY has us taking an ice cream personality test. Here's how mine turned out:


Your Ice Cream Personality:


You are not a particularly modest person. You're proud of who you are, and you don't care who knows it.


You are incredibly cautious. You rather miss out on something than make a mistake. No one would ever call you wild... but they would call you responsible.


You are a somewhat open minded person, but deep down you're fairly conservative. You don't like trying new things very much. And if you do find something new you like, you stick with it.


You tend to have a one track mind. You prefer not to multitask.


You can be a big dramatic and over the top sometimes. You are bold in every way


Pretty accurate - of course, I don't know what the other results show LOL.... Wanna see what ice cream says about your personality? Link above!

And finally, leaving you with a Hybrid project I did a few weeks ago for Sara Amarie


Credits can be found HERE

That's it for me today! See you soon!!

Monday, September 8, 2008

Good Monday Morning - sharing a few Hybrid projects

I just have to say that I am having the time of my life (digi-life that is!) right now. I just love playing around and creating new hybrid things. And the designers at the Sweet Shoppe make it so easy and so much fun. First thing I have to share is a tattoo that I created for Penny Springmann's blog using her Chirp kit. It was created using Invent It! Body Sticker Tattoos for ink jet printers.


And in August, I created this Hybrid bridal shower card for my niece. She and her husband to be are very outdoor-sy people. The gift card is for a major sporting goods retail store - Amanda informed me that she used the card for a much needed new life jacket for Kayaking.


Credits can be found HERE

So, after creating the bridal shower card, a light bulb came on and I began planning out a fun baby shower card that could hold a gift card and this is what I came up with:


Credits for the Baby room card can be found HERE

I actually have 2 projects that are in the "planning" stage right now. I have the kits and am working on buying the supplies I need to complete them. I'm on vacation from my full time job this week but am working extra full time this week at my other job for extra cash so I'll have some daytime project time.

That's it for today - catch ya on the flip side!!

Sunday, August 24, 2008

I'm back and cleaning up the cobwebs that are growing in the corners of my blog!!!

Wow... it's been awhile since I've been here. I can't believe it's almost the end of August already! Kids start school today. I now have 2 in high school and one in middle school. Where is the time going??? I know I've been a busy little bee with all the projects I've done over the last few weeks. Here they are:

First up - a card I did trying something new. I'm pretty happy with it except for the writing I did on the front. I should have used a font. The kites on the card are all attached using pop dots and the kite string is actual string from a real kite! The kite tails are my attempt at doodling! LOL All in all, I think it turned out cute for my first one.

Front of card:


Inside of card:


Credits: Kites made using Penny Springmann's Summer Fun collection: solids and alpha
Cloud paper by Amy Cheeseman
Grass on front of card is from Penny’s Summer Fun Collection: Hopscotch
kite template by me
the “wood” on the kites was done using the pen tool and then an inner bevel
font: 2peas Barefoot Professor.[/center]


Next up is a 3D card I made for my niece's bridal shower. The tent flap folds back to reveal the sports store gift card that I bought her. She and her future husband enjoy anything outdoor-sy. The lantern, moon, sign and fire are on pop dots. The skillet was an element that was on the shower invite that I received from her.


Credits: Kristin Cronin-Barrow's Gone Camping kit
Grass from Penny Springmann and Misty Cato's Chilling and Grilling kit
envelope template by Bree

and last for today is a Slumber party mini tin invite I made for my daughter to pass out. I found these cute little 4" tins in the $1 spot at Target. I removed the handles, sprayed the tin white and then added my side panels. Each tin will include the party information, mini bottles of nail polish, a nail file, nail decals, small bottle of scented lotion, mini flash light and of course, Chocolate!!!


Credits: MandaBean and Robin Carlton's Stop! Jammer Time kit

And that's it for today! Thanks for stopping by and taking a peek at my latest hybrid projects! Stop back soon and see what else I've done!

Saturday, July 5, 2008

Tissue Paper Stretched Canvas Hybrid Project

These Tissue Paper Canvas project instructions were originally written by me on March 27, 2007 for a monthly project in a digital scrapbooking newsletter. These instructions were posted in several forums across digi-land, however, due to sites changing hands and the closing of sites, I felt it was time to bring my project instructions home and post them on my blog.


You can click on the preview for a look at the full sized, better quality photo.

Stretched canvas can be purchased at any craft store, art supply store or online from sites such as www.amoebaartshop.com. A google search will bring up other sites. Stretch canvas resembles Aida cloth (cross stitch material) which has been stretched over a wood frame for a 3 dimensional look. Stretched canvas is available in many different sizes from 4 x 4" to 12 x 12" and also can be purchased in rectangular sizes such as 5 x 7" and 8 1/2 x 11". The depth (or sides) of your canvas can also vary from 3/4" thick to 3" thick. For my project, I used 5x5" square stretched canvas with a 1 1/2" side. My canvas cost just under $4.

Once you have purchased your stretched canvas, you will need to measure the canvas surface. I know, I know... I know what you're thinking, "why did she measure the surface when she just said she bought a 5x5" canvas?" Just trust me when I say "measure twice, so you only have to print ONCE!" My canvas when measured was actually 5 3/8 x 5 1/2". Each canvas may measure a little differently than the previous one. You will need to convert your measurement into decimals in order to accurately resize your layout for printing.

Now, you have the daunting task of picking which layout you want to use for this project. To me, that was the most difficult! Since my stretched canvas was 5 3/8 x 5 1/2" which equals 5.375 x 5.5", I resized my ORIGINAL full sized 300dpi layout to 5.25 x 5.375" maintaining my 300dpi. (I used an online fraction to decimal converter to figure out my calculations. A good one can be found at www.webmath.com.) I did not want my printed layout extending over the edge of the canvas. In your program of choice, open a new image 8 1/2 x 11, 300dpi, and filled white. Copy and paste your resized layout onto this new blank image. Center your layout. This is an important step as it allows you to control the placement of your layout during printing. **Always do a draft test print (using grayscale to save on ink)on paper before doing your final print**

Next, we need to print our full color layout. We're not going to print on regular computer paper or even on cardstock. We are going to print our layout on tissue paper. To do this, you will need white tissue paper. Simply cut a piece of tissue paper about one inch smaller than the size of your computer paper. Lay the tissue paper on top of the computer paper you just test printed on and smooth it out. Use small 1 inch sections of tape (I used masking tape on one and scotch tape on another) to tape down all edges of the tissue paper. Completely tape down one side of your tissue paper before moving on to the next until all four sides are taped down. Do your best to have no wrinkles or bunching of the tissue paper. All edges of the tissue paper MUST be taped down and all tape MUST be flat.


**One of Janie (scrapastrophe) hints was to tape the sides of the tissue onto the back of your master paper so that you can print a little bit more on the edges and it gives a bit more tissue to play with. This will allow you to print up to an 8 x 8 sized tissue paper layout.**

Place your taped tissue paper in your print tray and print your layout using your printer's best print option. Allow your printed layout to sit for 24 hours before continuing with this project.

After your layout has cured for 24 hours, gently remove the tissue paper from the computer paper and cut around your tissue paper layout.

Again, check the size of your printed tissue paper layout on your canvas. Trim edges as necessary.

Position your tissue paper layout on your canvas. Lift the right half of your layout up and apply a thin coating of Matte finish Mod Podge glue on that half of the canvas with a foam brush. Very slowly roll the tissue paper back in place starting in the middle and working to your right. Go slow - gently touching and dabbing the tissue paper as it settles on to the glue. DO NOT press and RUB - this will smear your ink and may rip your tissue paper. Repeat for the left side of your layout. Air bubbles can be removed by poking the tip of a needle or pin into the bubble and then flattening the bubble. Allow to dry for 2 hours.
**I've also successfully used Plaid's scrapbooking glue pen with the dauber tip to adhere my layout to the canvas using the same technique as above**

Using a foam brush, apply several thin coats of Mod Podge glue over the entire surface of your layout and canvas making sure to get the edges of your layout. Allow to dry 30 minutes between coats of Mod Podge. Once completely dry, apply 2-3 layers of a clear acrylic sealer with a Matte finish, allowing each layer to dry completely.

These look GREAT displayed in a plate stand or hanging on a wall. If you have any questions about the instructions or would like to show off your creation using my instructions, please email me at wildblueeyez at comcast dot net. I'd love to see what you've done!!!