Showing posts with label tutorial. Show all posts

Saturday, May 1, 2010

It's a ScrapMatters iNSD Blog Train

Just a very quick posting from me this morning!

If you are here for the Blog Train - Welcome!!You should be arriving from Amber's stop on the train http://ambersscrapspot.blogspot.com/ .

If you have arrived here and haven't been following the train, make sure you go to the ScrapMatters blog to start the train so that you aren't missing any of the goodies that will be available on this train!

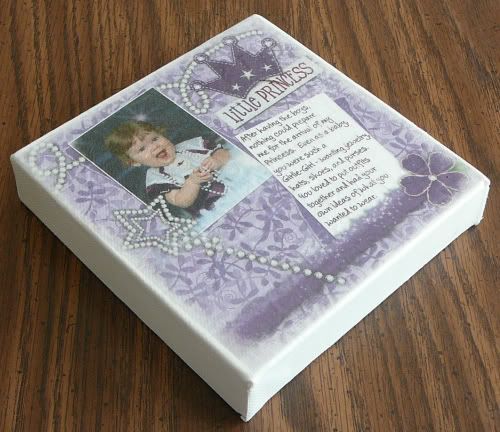
Here is the preview of my blog train stop freebie:

*Sorry - but the blog train is over and the link has been removed*

This freebie coordinates with the printable that I created using the ScrapMatters Design Team collab "Moments that Matter"


The printable set that the Hybrid Team and Designers put together as a Free with Purchase:


I call my printable a "Will you be my....?" box - I thought it would be a super cute way for the Bride-to-Be to ask her friends or family to be her bridesmaid/maid of honor/matron of honor. My blog freebie could be printed out and added to the top of the box to "pop" it off to make it more 3D.

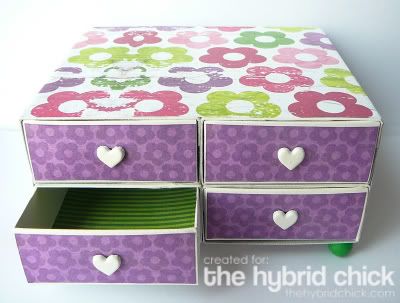
The box from the outside:


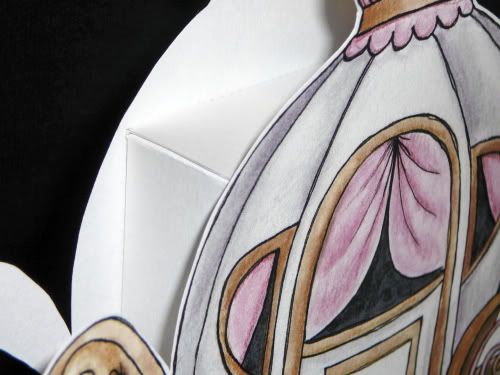
and here's what the inside would look like assembled:


This was really easy to put together and it could be changed to whatever color you'd like just by changing the buttons.

Supplies needed to put this box together: Adhesive of choice, ribbon of choice, buttons of choice, glue dots.

First, print (on your printer's best print settings - I highly recommend Red River paper for printing your projects or Epson Matte Presentation Paper for the best color), cut all pieces and assemble the box.

Punch holes in the journal tabs that spell out "Will you", "be my", "bridesmaid" or other wedding party postion and then the "Say Yes!" tab.

Next, cut a length of ribbon atleast 12 inches long. Slide the journal tabs onto the ribbon and space to your liking. Leave a couple of inches at the top so that you can adhere it to the inside of the box lid with a glue dot.

Then I strung thin twine through the buttons from the front to the back and tied the buttons to the ribbon just above each tab.

Trim the bottom of your ribbon.

And there you have it - a fun way to ask a friend or a family member to take part in your special day!

Hope you enjoy it! Your next stop on the blog train is the Fabulous Jenna http://www.sweetazshooga.com

If you get lost along the way, you can go back and start at the ScrapMatters blog

Monday, March 29, 2010

3/29 It's a Blog Hop featuring Kelleigh Ratzlaff Designs!

Oh my....has it really been 4 1/2 months since my last blog post? Yepp...it sure has. What better way to get back into blogging than to join in on a blog hop!!!

Kelleigh Ratzlaff's Creative Team at The Digichick is having a hop (appropriate for this time of the year huh? LOL). There are 22 extremely creative artists joining in on the fun!

One lucky hopper (that's you!) will win a $10 gift certificate to Kelleigh's store just for commenting on her blog post with your vote for your favorite Creative Team project from the hop. One lucky Creative Team member will win $10 in PayPal cash for earning the most votes!! The Blog Hop contest winners will be announced on Thursday, April 8th on Kelleigh's blog.

So, what did I make? Well, one of my favorite things to do is to take a template and "do it" differently than it was intended. Earlier this month on The Hybrid Chick, I turned Kelleigh’s Heart Purse template into a Bridal shower/wedding favor. Make sure you check it out! Almost makes me wish I was getting married again.....almost!!!!

So for Kelleigh's blog hop, I decided to use her Take-Out box template.


I also used Lil Dude by Jennifer Fox, Nikki Epperson, and Melissa Bennett to create my project. I just love the papers in this collab!!!


and here is what I created:


and yes, that really is Kelleigh's Take-Out Box template!!! Wanna know how I made this using that template?

First I opened Kelleigh's large sized Take-Out Box template. I worked with the "lines only" layer - hide or delete all other layers. Next I erased the lines that would create the top flaps of the box. Then I rotated the lines layer on the canvas and enlarged it until it was as wide as my canvas. I copy and pasted the lines only layer onto my patterned paper. I changed to color of my score lines to white by adding a new layer over top of the lines, flood filling the new layer with white and then hitting "control + G" to clip the white to my score lines.

Next, I printed a full 8.5 x 11 sheet (borderless) of the green paper from the kit on Epson Matte Double Sided Presentation Paper. Then I turned the presentation paper over and printed a full sheet (borderless) of the patterned paper along with the lines of Kelleigh's template that I changed as above.

After cutting around the edges of my template, I scored all of my dashed lines and creased my scores. The triangular shaped pieces of the template were scored and folded inward instead of outward. On a regular take-out box, the pieces fold outward and then are folded against the outside of the box. This is what it will look like scored and ready to assemble:


Next, I made a faint pencil mark along the fold of each of the triangular shaped pieces and then used my crop-o-dile to punch the holes.


See above photo to see where I positioned the holes on the template.

Next I took one end of some embroidery thread and threaded it through the holes the whole way around twice ending in the same space I began.


After pulling the strings to form my basket, I tied a knot and snipped the loose ends of the thread close to the knot.


To create the handle, I cut a narrow strip of coordinating paper the length I wanted my handle to be. On both ends of my handle, I folded approx. 1/2 inch to the underside. I then punched holes at each end of the handle for the brads.


Positioning the handle on the tightened embroidery floss in the center of the basket, I added the brads to secure the handle in place. Repeat on opposite side.


To finish my project, I decorated the sides of my box/basket and the handle.


And that's my project for the blog hop! Make sure you check out all the stops on the Blog Hop (just keep in mind that those participating are all over the world and in different time zones so be patient and check back later in the day if a post on the list isn't up!)

Here are your Blog Hop Stops:
Kelleigh
Tracy
Sally
Laura
Juli
Julie
Christy
Dana
LuAnn <---You are here!
Jacinda
ViVa
Dalis
Holly
Sharyn
Karen Lewis
Linda
Alice
Mel
Sunghee
Carolina
Debbie
Kim

Don't forget to go back to Kelleigh's blog and leave a comment at the end of her Blog Hop post with your favorite Creative Team project for a chance to win a $10 gift certificate to Kelleigh's store.

Thanks for stopping by and hope you enjoy the hop!!

Saturday, November 14, 2009

Drive-by Posting today......

Just wanted to do a quick post this morning with my most recent hybrid project that I created for The Hybrid Chick blog.


Head on over and take a peek at how I created one of my most favorite projects so far! I had been thinking about how I wanted to make this for a few weeks now and am stoked with how it turned out! I think the only thing I'd do differently next time is make the inner box bigger.

I'd love to know what you think of my newest project!

that's it for today! Have a good one!

Thursday, June 11, 2009

*clearing out the cobwebs that are growing on my blog*

I think I've been avoiding my blog because I want to update it but I'm not sure how. I just need to sit and play around with the HTML and make it mine! *sigh* maybe someday.....

For the 6/4 Sweet Shoppe FOBTY we are to blog about our favorite animal at the zoo. Mine has to be the Giraffe! There's just something about them. I love the coloring and the pattern on them. and look out if I see a giraffe in a digital kit!!! I was at Joann Fabrics last week and saw THE cutest baby quilt fabric. it was already done up like a patchwork quilt with textured giraffes and frogs on it. Tomorrow's payday and I just have to go get that fabric to make a blanket. You never know when you need a baby gift! or maybe I'll just tuck it away for the future.....

For the 6/11 FOBTY, we were to take a What Taste are You? quiz. Here are my results:


You Are Bitter


You aren't bitter at the world, even though you have a strong personality.

Instead, you are sophisticated and cultured. You appreciate acquired tastes.


You are very powerful. You have the ability to change a room's energy.

While some may find you disagreeable, your points of view are intelligent and interesting.


Hahahaha.....bitter? LOL ok....I do have a strong personality. not online though. I tend to be kinda shy esp. around other strong personalities.

I have some recent projects to share and a few layouts but I need some sort of posting schedule because I am waaaaaaaaaaay behind and don't want to post them all.

I will post one of my most favorite projects ever.....a Carriage wedding favor box:


and a close up:


The digital Carriage element used for this project was designed by Kate Hadfield specifically for this project. Thank you Kate!!!
Instructions can be found in TDS archives

And my next to favorite recent project - a matchbox treasure chest created for The Hybrid Chick:


Instructions to make your own are posted on The Hybrid Chick

that's it for today - hopefully I'll be back in a few days with some more recent Layouts and projects!

Saturday, December 13, 2008

Hybrid Cocoa Pockets

Hi there! It's been a long time since my last post. I've been busy getting ready for the holidays (both Thanksgiving and Christmas). I can't believe christmas is in 12 days!!! I haven't even begun shopping for the kids. Hubby and I are going later this evening and will pretty much finish them in one night. But enough about that, I'm sure you're here to see what I've cooked up...


I came across these little cocoa holders while blog hopping. The idea and inspiration came from Barbara Schram's stamping blog here. Her cocoa packets are AMAZING!!! She was so very kind to post links to the instructions for the paper cup(which I will refer to as the pocket LOL). I think she must have used 12 x 12 sized papers - some were done with double sided papers too because her pockets were bigger than mine turned out.

So, I set about making a digital version and here's how I did mine.

In Photoshop, I opened 2 papers from Penny's Cocoa Mallow Stick kit - the brilliant blue called out to me so I chose it and then did color replacement to change the snowflake paper from neon green to a light blue color. I resized my papers to 8 x 8 and layered them on top of each other on a blank 8.5 x 11" 300dpi canvas.

Now here's where it was a bit tricky. I needed to print one of my 8x8 papers on each side of my white printer paper so that I ended up with a double sided square. I made one of my papers invisible for the first printing. Print on your printers best setting. Allow the ink to dry for a few minutes before you turn that page over and put it back in your paper tray to print on the other blank side. Make sure you feed the same end of the paper into the printer.

**As always, I recommend doing a test print using grayscale (to save ink) to make sure your squares line up back to back when printing. For some reason I had to move one paper just a smidge to one side in order for them to line up perfectly**

In your program, hide the paper layer you just printed and make the other paper layer visible. Print. If you hold your paper up to light, you will be able to see if your squares lined up. Allow ink to dry before handling and folding, otherwise you'll get fingerprints elsewhere on your pocket. *trust me on this!!! LOL)

Cut your square double sided paper. Follow the instrucions for making a paper pocket. (When I folded my points to the opposite side, I touched the point to the edge of the opposite side and then eyeballed the other side to make sure it was going to look right). Once I was happy with how it looked, I made my folds and creased them with my fingers tips.

I (like Barbara) folded my flaps to the outside of my pocket instead of tucking them
in. I used a glue dot under the edge of the diagonal fold and also under the point of the folded down pieces to hold my pocket together. Boo hoo - I was out of my Xyron tape runner!

Embellish as you desire. I used glue dots to adhere my embellishments. Add a packet of cocoa (or baggie of homemade cocoa), some mini marshmallows, and of course a spoon! If my pockets were bigger, I would have tossed some mini chocolate chips and/or some colorful sprinkles in baggies in there too! Jewelry bags would have made for a better presentation.

And here's one I did for a baby shower favor - add some shower mints and you're all set!


Wouldn't these be super cute to pass out for Valentine's day??? My daughter asked me if these were Chinese cups - as she knows how to fold paper to make these. So I'm thinking these would be a fun project to get the kids involved in!

I'd love to see your version of these - so drop me a line if you make some!!!

Saturday, July 5, 2008

Tissue Paper Stretched Canvas Hybrid Project

These Tissue Paper Canvas project instructions were originally written by me on March 27, 2007 for a monthly project in a digital scrapbooking newsletter. These instructions were posted in several forums across digi-land, however, due to sites changing hands and the closing of sites, I felt it was time to bring my project instructions home and post them on my blog.


You can click on the preview for a look at the full sized, better quality photo.

Stretched canvas can be purchased at any craft store, art supply store or online from sites such as www.amoebaartshop.com. A google search will bring up other sites. Stretch canvas resembles Aida cloth (cross stitch material) which has been stretched over a wood frame for a 3 dimensional look. Stretched canvas is available in many different sizes from 4 x 4" to 12 x 12" and also can be purchased in rectangular sizes such as 5 x 7" and 8 1/2 x 11". The depth (or sides) of your canvas can also vary from 3/4" thick to 3" thick. For my project, I used 5x5" square stretched canvas with a 1 1/2" side. My canvas cost just under $4.

Once you have purchased your stretched canvas, you will need to measure the canvas surface. I know, I know... I know what you're thinking, "why did she measure the surface when she just said she bought a 5x5" canvas?" Just trust me when I say "measure twice, so you only have to print ONCE!" My canvas when measured was actually 5 3/8 x 5 1/2". Each canvas may measure a little differently than the previous one. You will need to convert your measurement into decimals in order to accurately resize your layout for printing.

Now, you have the daunting task of picking which layout you want to use for this project. To me, that was the most difficult! Since my stretched canvas was 5 3/8 x 5 1/2" which equals 5.375 x 5.5", I resized my ORIGINAL full sized 300dpi layout to 5.25 x 5.375" maintaining my 300dpi. (I used an online fraction to decimal converter to figure out my calculations. A good one can be found at www.webmath.com.) I did not want my printed layout extending over the edge of the canvas. In your program of choice, open a new image 8 1/2 x 11, 300dpi, and filled white. Copy and paste your resized layout onto this new blank image. Center your layout. This is an important step as it allows you to control the placement of your layout during printing. **Always do a draft test print (using grayscale to save on ink)on paper before doing your final print**

Next, we need to print our full color layout. We're not going to print on regular computer paper or even on cardstock. We are going to print our layout on tissue paper. To do this, you will need white tissue paper. Simply cut a piece of tissue paper about one inch smaller than the size of your computer paper. Lay the tissue paper on top of the computer paper you just test printed on and smooth it out. Use small 1 inch sections of tape (I used masking tape on one and scotch tape on another) to tape down all edges of the tissue paper. Completely tape down one side of your tissue paper before moving on to the next until all four sides are taped down. Do your best to have no wrinkles or bunching of the tissue paper. All edges of the tissue paper MUST be taped down and all tape MUST be flat.


**One of Janie (scrapastrophe) hints was to tape the sides of the tissue onto the back of your master paper so that you can print a little bit more on the edges and it gives a bit more tissue to play with. This will allow you to print up to an 8 x 8 sized tissue paper layout.**

Place your taped tissue paper in your print tray and print your layout using your printer's best print option. Allow your printed layout to sit for 24 hours before continuing with this project.

After your layout has cured for 24 hours, gently remove the tissue paper from the computer paper and cut around your tissue paper layout.

Again, check the size of your printed tissue paper layout on your canvas. Trim edges as necessary.

Position your tissue paper layout on your canvas. Lift the right half of your layout up and apply a thin coating of Matte finish Mod Podge glue on that half of the canvas with a foam brush. Very slowly roll the tissue paper back in place starting in the middle and working to your right. Go slow - gently touching and dabbing the tissue paper as it settles on to the glue. DO NOT press and RUB - this will smear your ink and may rip your tissue paper. Repeat for the left side of your layout. Air bubbles can be removed by poking the tip of a needle or pin into the bubble and then flattening the bubble. Allow to dry for 2 hours.
**I've also successfully used Plaid's scrapbooking glue pen with the dauber tip to adhere my layout to the canvas using the same technique as above**

Using a foam brush, apply several thin coats of Mod Podge glue over the entire surface of your layout and canvas making sure to get the edges of your layout. Allow to dry 30 minutes between coats of Mod Podge. Once completely dry, apply 2-3 layers of a clear acrylic sealer with a Matte finish, allowing each layer to dry completely.

These look GREAT displayed in a plate stand or hanging on a wall. If you have any questions about the instructions or would like to show off your creation using my instructions, please email me at wildblueeyez at comcast dot net. I'd love to see what you've done!!!