
This tutorial is written using PSE 4.0. I'm sure there are other ways of achieving the final result but this is how I did mine. Once you make one, you'll zip right through the making of another.
Open a 8.5" high x 5.5" wide 300dpi blank canvas. Using your rectangular marquee tool, select off the bottom half of your canvas.
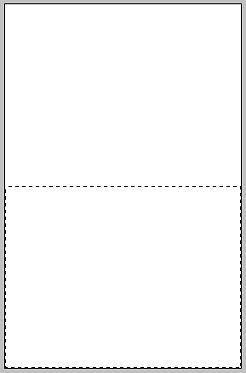
Add a layer and fill with white - this will be the front of your card. Deselect. Hide the bottom layer.
Working on the top layer, paste in a background paper of your choice. Resize to your liking. this will be the color/pattern of your onesie.
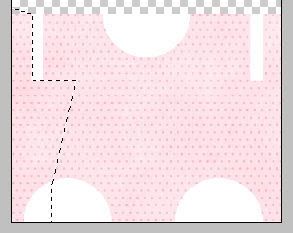
Position the tool at the bottom outer corner of the "cuff" of the sleeve. Click once and draw a straight line in toward the body of your onesie. I counted the number of hash marks that I moved inward so that I can make the other side the same size. I came in 15 markings and clicked. you should have a straight line.
Then I went back out toward the cuff 8 markings (don't click!!) and then straight down to the middle of the white circle that is our cut out of our leg. this creates the side of your onesie. Click once and then move to the bottom of the card and click. Move to the outer edge of your card and click, continue up to the top of the front of your card and come across to above the cuff, click and then finish the area by ending where you started. See screenshots below.
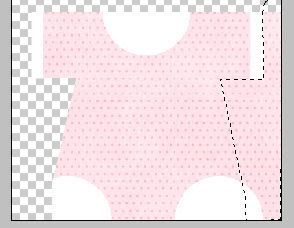
 Select your background paper layer and hit delete. choose the circle shape layer for that side and hit delete. Repeat the above directions for the other side and you should have this:
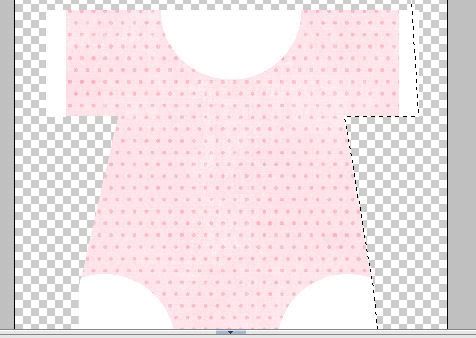
Let's clean up our onesie. Using your magic wand tool, select the circle shape that forms your neck cutout. Hit delete. While still selected, choose your background paper layer and hit delete. This will form the neckline of the onesie. Deselect. Repeat for both circle shapes that form the leg cutout.
At this point, you can decide if you like the cuffs on the onesie or not. I decided I didn't like my cuffs so I deleted these also using this technique. Delete those empty layers.
Next I found a round scallop element in my stash. I positioned it and resized it to fit around the leg cutout to resemble lace. Once you are happy with the look, select your onesie layer. Choose your magic wand tool and click in the space along your onesie. Select your scallop element layer and hit delete. this will leave only the "lace" along the cut out of the leg. Deselect. Repeat on the other side and again for the neck.
Add shadows to the scallops and the sleeve cuffs to your liking. Unhide your background layer. Don't worry about the "extra" shadow showing - this is good because it will give us cut lines when we print.
Add any embellishments you'd like to add to the front of your onesie or wait and add to the printed Onesie. Merge visible.
I added a 1 point black border to the edge of my card as a cutting guide. Print.
Embellish and there you have it! Your very own onesie card! If you have any questions, please feel free to email me at wildblueeyez at comcast dot net. Also, I'd LOVE to see your Onesie, so drop me a line!!!
Open a 8.5" high x 5.5" wide 300dpi blank canvas. Using your rectangular marquee tool, select off the bottom half of your canvas.
Add a layer and fill with white - this will be the front of your card. Deselect. Hide the bottom layer.
Working on the top layer, paste in a background paper of your choice. Resize to your liking. this will be the color/pattern of your onesie.
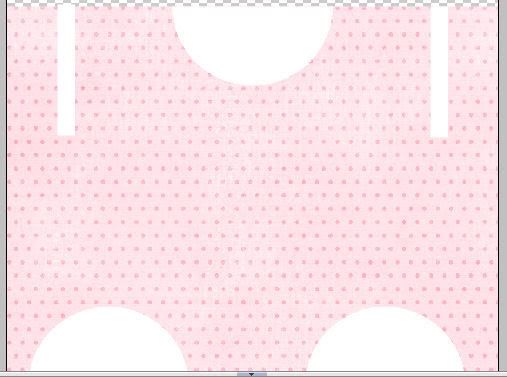
Using the ellipse tool, draw a small white circle - this will be used to form the leg cut out. Position it along the bottom of your card. duplicate the layer and position this circle for the other leg cut out. duplicate once again and move this circle to top center of the front of your card - this will form the neck of your onesie. You can see your onesie taking shape. Reposition the bottom circles to your liking. See photo below.
Now, again select your rectangular marquee tool. draw a rectangle on your card to form the cuff of a sleeve. Add a layer and flood will with white. Deselect. duplicate this layer and position on opposite site to form other sleeve. Use your ruler at the top to help space evenly. This is what your onesie should look like.
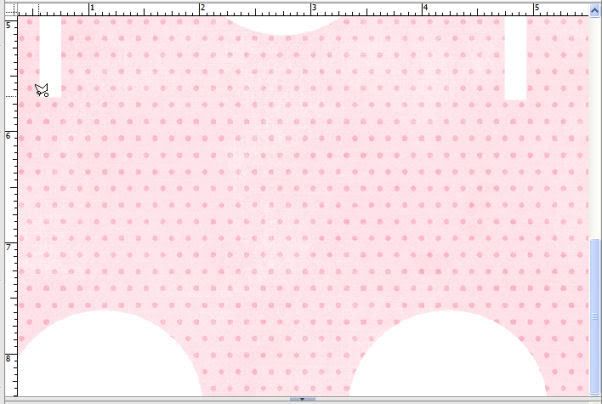
Choose your polygonal lasso tool - make sure your feather is set at 0. Here is where I utilize the ruler markings at the top of my canvas.
Position the tool at the bottom outer corner of the "cuff" of the sleeve. Click once and draw a straight line in toward the body of your onesie. I counted the number of hash marks that I moved inward so that I can make the other side the same size. I came in 15 markings and clicked. you should have a straight line.
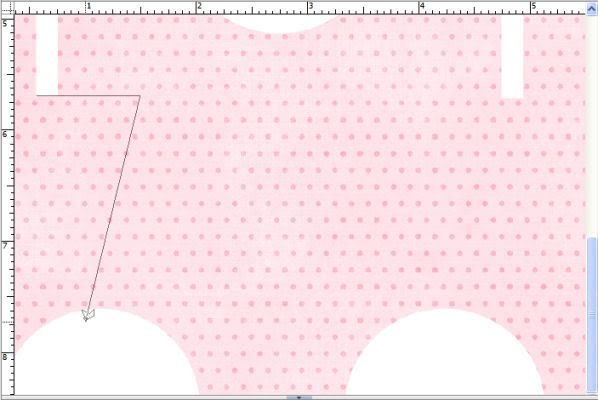
Then I went back out toward the cuff 8 markings (don't click!!) and then straight down to the middle of the white circle that is our cut out of our leg. this creates the side of your onesie. Click once and then move to the bottom of the card and click. Move to the outer edge of your card and click, continue up to the top of the front of your card and come across to above the cuff, click and then finish the area by ending where you started. See screenshots below.
Select your background paper layer and hit delete. choose the circle shape layer for that side and hit delete. Repeat the above directions for the other side and you should have this:**If you aren't happy with the shape of your onesie, now is the time to hit the undo button and go back and reposition the shapes that form the leg of your onesie. I also adjusted the neck cut out to my liking.**
Let's clean up our onesie. Using your magic wand tool, select the circle shape that forms your neck cutout. Hit delete. While still selected, choose your background paper layer and hit delete. This will form the neckline of the onesie. Deselect. Repeat for both circle shapes that form the leg cutout.
At this point, you can decide if you like the cuffs on the onesie or not. I decided I didn't like my cuffs so I deleted these also using this technique. Delete those empty layers.
Next I found a round scallop element in my stash. I positioned it and resized it to fit around the leg cutout to resemble lace. Once you are happy with the look, select your onesie layer. Choose your magic wand tool and click in the space along your onesie. Select your scallop element layer and hit delete. this will leave only the "lace" along the cut out of the leg. Deselect. Repeat on the other side and again for the neck.
Add shadows to the scallops and the sleeve cuffs to your liking. Unhide your background layer. Don't worry about the "extra" shadow showing - this is good because it will give us cut lines when we print.
Add any embellishments you'd like to add to the front of your onesie or wait and add to the printed Onesie. Merge visible.
I added a 1 point black border to the edge of my card as a cutting guide. Print.
Steps for cutting out your onesie:
Using a ruler, I lightly scored the fold line (along the shoulders of my Onesie) and then folded my card. Using scissors, I cut the straight edges on the front of my onesie - the sides of the sleeves, along the sides. I only cut the front of my card at this time. Next I cut out the legs and neck. Use the front of your onesie to lightly trace with pencil the Onesie shape onto the back of your card.
Using a ruler, I lightly scored the fold line (along the shoulders of my Onesie) and then folded my card. Using scissors, I cut the straight edges on the front of my onesie - the sides of the sleeves, along the sides. I only cut the front of my card at this time. Next I cut out the legs and neck. Use the front of your onesie to lightly trace with pencil the Onesie shape onto the back of your card.
Finish cutting. Do not cut through the "shoulders" of your onesie!
Embellish and there you have it! Your very own onesie card! If you have any questions, please feel free to email me at wildblueeyez at comcast dot net. Also, I'd LOVE to see your Onesie, so drop me a line!!!
10 comments:
FANTASTIC! I LOVED this card when I saw it at SSD. So adorable. Thanks for the instructions!
How stinkin' cute is this!!!! You come up with the best hybrid projects and they're all so inspiring.
Very sweet of you to take the time to make these instructions! So awesome, and btw! I love Traci Reed!
very cool hybrid card!
Too bad I dont know anyone having babies! Thank you so much for sharing this card with us!!
This is fantastic!!! WOW....have a great weekend... :)
What a cute card! Thanks for sharing that well written tutorial on how to make one.
Simply adorable!
That's ridiculously cute!
Thanks for the directions! We have 2 babies being born soon to friends, and onesie cards would be perfect!
thank you thank you... LOVE THIS!
Post a Comment