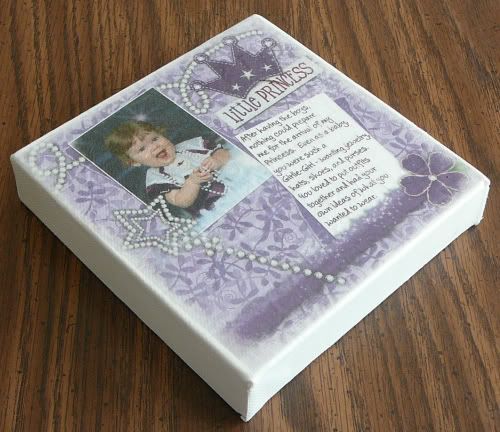
These Tissue Paper Canvas project instructions were originally written by me on March 27, 2007 for a monthly project in a digital scrapbooking newsletter. These instructions were posted in several forums across digi-land, however, due to sites changing hands and the closing of sites, I felt it was time to bring my project instructions home and post them on my blog.

You can click on the preview for a look at the full sized, better quality photo.
Stretched canvas can be purchased at any craft store, art supply store or online from sites such as www.amoebaartshop.com. A google search will bring up other sites. Stretch canvas resembles Aida cloth (cross stitch material) which has been stretched over a wood frame for a 3 dimensional look. Stretched canvas is available in many different sizes from 4 x 4" to 12 x 12" and also can be purchased in rectangular sizes such as 5 x 7" and 8 1/2 x 11". The depth (or sides) of your canvas can also vary from 3/4" thick to 3" thick. For my project, I used 5x5" square stretched canvas with a 1 1/2" side. My canvas cost just under $4.
Once you have purchased your stretched canvas, you will need to measure the canvas surface. I know, I know... I know what you're thinking, "why did she measure the surface when she just said she bought a 5x5" canvas?" Just trust me when I say "measure twice, so you only have to print ONCE!" My canvas when measured was actually 5 3/8 x 5 1/2". Each canvas may measure a little differently than the previous one. You will need to convert your measurement into decimals in order to accurately resize your layout for printing.
Now, you have the daunting task of picking which layout you want to use for this project. To me, that was the most difficult! Since my stretched canvas was 5 3/8 x 5 1/2" which equals 5.375 x 5.5", I resized my ORIGINAL full sized 300dpi layout to 5.25 x 5.375" maintaining my 300dpi. (I used an online fraction to decimal converter to figure out my calculations. A good one can be found at www.webmath.com.) I did not want my printed layout extending over the edge of the canvas. In your program of choice, open a new image 8 1/2 x 11, 300dpi, and filled white. Copy and paste your resized layout onto this new blank image. Center your layout. This is an important step as it allows you to control the placement of your layout during printing. **Always do a draft test print (using grayscale to save on ink)on paper before doing your final print**
Next, we need to print our full color layout. We're not going to print on regular computer paper or even on cardstock. We are going to print our layout on tissue paper. To do this, you will need white tissue paper. Simply cut a piece of tissue paper about one inch smaller than the size of your computer paper. Lay the tissue paper on top of the computer paper you just test printed on and smooth it out. Use small 1 inch sections of tape (I used masking tape on one and scotch tape on another) to tape down all edges of the tissue paper. Completely tape down one side of your tissue paper before moving on to the next until all four sides are taped down. Do your best to have no wrinkles or bunching of the tissue paper. All edges of the tissue paper MUST be taped down and all tape MUST be flat.

**One of Janie (scrapastrophe) hints was to tape the sides of the tissue onto the back of your master paper so that you can print a little bit more on the edges and it gives a bit more tissue to play with. This will allow you to print up to an 8 x 8 sized tissue paper layout.**
Place your taped tissue paper in your print tray and print your layout using your printer's best print option. Allow your printed layout to sit for 24 hours before continuing with this project.
After your layout has cured for 24 hours, gently remove the tissue paper from the computer paper and cut around your tissue paper layout.
Again, check the size of your printed tissue paper layout on your canvas. Trim edges as necessary.
Position your tissue paper layout on your canvas. Lift the right half of your layout up and apply a thin coating of Matte finish Mod Podge glue on that half of the canvas with a foam brush. Very slowly roll the tissue paper back in place starting in the middle and working to your right. Go slow - gently touching and dabbing the tissue paper as it settles on to the glue. DO NOT press and RUB - this will smear your ink and may rip your tissue paper. Repeat for the left side of your layout. Air bubbles can be removed by poking the tip of a needle or pin into the bubble and then flattening the bubble. Allow to dry for 2 hours.
**I've also successfully used Plaid's scrapbooking glue pen with the dauber tip to adhere my layout to the canvas using the same technique as above**
Using a foam brush, apply several thin coats of Mod Podge glue over the entire surface of your layout and canvas making sure to get the edges of your layout. Allow to dry 30 minutes between coats of Mod Podge. Once completely dry, apply 2-3 layers of a clear acrylic sealer with a Matte finish, allowing each layer to dry completely.
These look GREAT displayed in a plate stand or hanging on a wall. If you have any questions about the instructions or would like to show off your creation using my instructions, please email me at wildblueeyez at comcast dot net. I'd love to see what you've done!!!


