Saturday, December 13, 2008

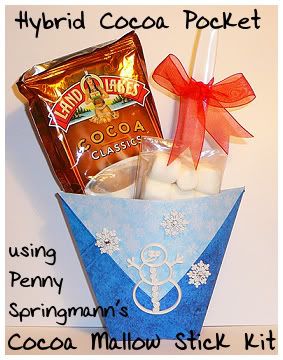
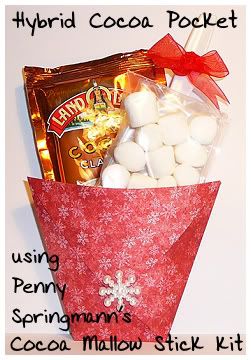
Hybrid Cocoa Pockets

Hi there! It's been a long time since my last post. I've been busy getting ready for the holidays (both Thanksgiving and Christmas). I can't believe christmas is in 12 days!!! I haven't even begun shopping for the kids. Hubby and I are going later this evening and will pretty much finish them in one night. But enough about that, I'm sure you're here to see what I've cooked up...


I came across these little cocoa holders while blog hopping. The idea and inspiration came from Barbara Schram's stamping blog here. Her cocoa packets are AMAZING!!! She was so very kind to post links to the instructions for the paper cup(which I will refer to as the pocket LOL). I think she must have used 12 x 12 sized papers - some were done with double sided papers too because her pockets were bigger than mine turned out.

So, I set about making a digital version and here's how I did mine.

In Photoshop, I opened 2 papers from Penny's Cocoa Mallow Stick kit - the brilliant blue called out to me so I chose it and then did color replacement to change the snowflake paper from neon green to a light blue color. I resized my papers to 8 x 8 and layered them on top of each other on a blank 8.5 x 11" 300dpi canvas.

Now here's where it was a bit tricky. I needed to print one of my 8x8 papers on each side of my white printer paper so that I ended up with a double sided square. I made one of my papers invisible for the first printing. Print on your printers best setting. Allow the ink to dry for a few minutes before you turn that page over and put it back in your paper tray to print on the other blank side. Make sure you feed the same end of the paper into the printer.

**As always, I recommend doing a test print using grayscale (to save ink) to make sure your squares line up back to back when printing. For some reason I had to move one paper just a smidge to one side in order for them to line up perfectly**

In your program, hide the paper layer you just printed and make the other paper layer visible. Print. If you hold your paper up to light, you will be able to see if your squares lined up. Allow ink to dry before handling and folding, otherwise you'll get fingerprints elsewhere on your pocket. *trust me on this!!! LOL)

Cut your square double sided paper. Follow the instrucions for making a paper pocket. (When I folded my points to the opposite side, I touched the point to the edge of the opposite side and then eyeballed the other side to make sure it was going to look right). Once I was happy with how it looked, I made my folds and creased them with my fingers tips.

I (like Barbara) folded my flaps to the outside of my pocket instead of tucking them
in. I used a glue dot under the edge of the diagonal fold and also under the point of the folded down pieces to hold my pocket together. Boo hoo - I was out of my Xyron tape runner!

Embellish as you desire. I used glue dots to adhere my embellishments. Add a packet of cocoa (or baggie of homemade cocoa), some mini marshmallows, and of course a spoon! If my pockets were bigger, I would have tossed some mini chocolate chips and/or some colorful sprinkles in baggies in there too! Jewelry bags would have made for a better presentation.

And here's one I did for a baby shower favor - add some shower mints and you're all set!
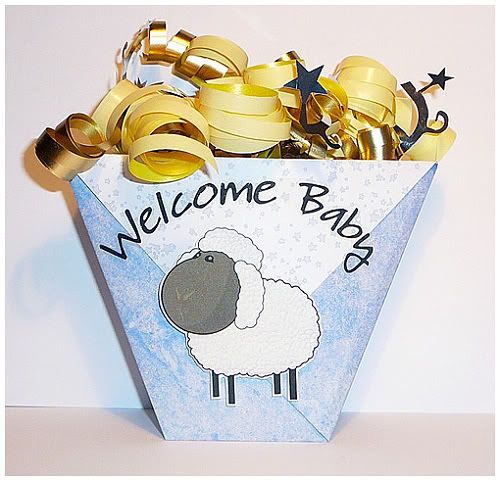


Wouldn't these be super cute to pass out for Valentine's day??? My daughter asked me if these were Chinese cups - as she knows how to fold paper to make these. So I'm thinking these would be a fun project to get the kids involved in!

I'd love to see your version of these - so drop me a line if you make some!!!

Wednesday, November 12, 2008

A few new cards to add to my "box"

So, since the Sweet Shoppe started with the 52 card pick up challenge, I have been more and more interested in creating cards. I decided to start a box for all my cards and give them to my sister for Christmas. I only have about 10 cards in there so far but what an assortment! I need to work on catching up on the SSD weekly challenges. I also found a really fun "It's in the Cards" challenge at Scrapmatters.com. They provide a template and you go about creating your card. I've only done 2 so far but have a few more in the works!

Here are 2 cards that I created for the It's in the Cards challenge at Scrapmatters:


Credits: Webby Buddies by Eva Kipler, Penny Springmann and Libby Weifenbach
Font is HeatherG by Darcy Baldwin
template by Jaime (ocmath)


Credits: Orange paper by Eva Kipler
Halloween elements from Heather Roselli's Boo Crew Add-on
Green ribbon from Misty Cato's Adorable Me kit
Grass is from Misty Cato and Penny Springmann's Chillin and Grillin kit
template by Dawn (winkasheart)

And last by not least, I subscribe to a really cool stamper blog: http://www.mothermark.blogspot.com/

Each Tuesday, she is having a Teapot Challenge - she will post a photo of a teapot and we are to make a card inspired by the teapot she posts! She has the cutest teapot this week! It's a Mary E teapot! I love the black and white checkered pattern on here - this is probably what I am going to use as my inspiration! Sounds like an interesting challenge! Stop back soon to see my card inspired by this challenge.

Since it looks like she started this back in July, I may have to play catch up and check out the previously posted teapots and see what I can come up with! After all, I only have 42 days 'til Christmas!! Yikes! it will be here before I know it.....

Tuesday, November 11, 2008

Hybrid Baby Shower Favor and Candy Bouquet

Just to back up a bit and give you a little story as to how this came to be...At the beginning of October someone posted on our local Freecycle site looking for any leftover baby shower favors, decorations, etc. Well, I couldn't let someone "collect" various favors for a special time in a new Mom's life, so I emailed the lady and offered to do all of the baby shower favors for her. Had no idea who the ladies were and have never met them. After a few emails about the size of the shower and themes, I went to work. I also offered to create 2 candy bouquets for her to use at the shower in any way she wanted.

Here is the Baby shower favor I created for her - I also wrapped about 25 shower mints in white netting and tucked them in the shoe.


I found the idea online, followed their instructions and then went about "fixing" the first one to look more like a shoe, including the area for the "laces"

The little hanging tag was created using Melissa Bennett's Bundle of Boy kit from the Sweet Shoppe, font is Darcy Baldwin's HeatherG, and saying on the tag says: Little hands, little feet, pure and precious, and oh so sweet!

Here is one of the candy bouquets I made - both were the same.


Credits can be found HERE

I'll be posting my instructions on the Candy bouquet on my blog this week for anyone that is interested!

That's it for today! See you again soon!

Thursday, October 30, 2008

FOBTY 10/24 and 10/30

These are always fun little quizes and tests to do, however, the "What your Jack-o-lantern says" about is me is so far off. I LOVE Halloween and would never miss it. Anywho, here are my results:


What Your Jack-o-Lantern Says


You tend to be a bit of a grouchy person. The scrooge of Halloween.

And while you may complain about it, you would miss Halloween if it didn't come around.


This Halloween you should embrace your inner grump - be a warlock or a witch.

The candy you should give out: sour patch kids


And onto today's FOBTY quiz (again waaaaaaaaaay off LOL):


What Your Cute Monster Says About You


You are a simply happy person. You still view the world with a childlike innocence.

You have an easy going attitude, and you value harmony. You love freely and inspire others to love.


You inner demon is frailty. You are easily beaten down by life.

People think you're cute because you are optimistic. Your outlook on life is charming.


that's it for today :)

Thursday, October 16, 2008

Playing catch-up!

So, last posting I promised some new Hybrid projects I've done. It's been awhile since I've posted anything over here, so I have a few to show off.

First is my most favorite project so far! When I was digging through my stash box for the tattoo paper, I came across a few of my chick feeder bases that I had crafted with a few years ago. I added a new coat of paint and digitally created a label for the jar and PRESTO! I did this project for Hybrid Hump day over at Penny Springmann's blog. Isn't it purty??? LOL


I made the label using Penny Springmann's Boo to You 2008 kit

And I am absolutely stoked that my people feeder will be featured at The Daily Scrapper on 10-17-08!!!

Another project created for Penny's Team Hybrid project which we do monthly was this clock. The team used Shrinky Dinks for our projects - and wow...there were some great ideas! Check them out at this post over at Penny's blog.


I used Penny's Garage Grunge kit for this project - the wrench and screwdriver clock hands are my Shrinky Dinks!!! What guy wouldn't love this hanging in his garage or work area???

And lastly tonight, for the FOBTY challenge at SSD- Which Halloween candy are you:


Halloween Candy Quiz


Halloween Candy Quiz


You are a Pumpkin Jelly


Like the pumpkin jelly candy you are soft and gentle


Find out which Halloween Candy you are at Quizopolis.com


That's it for me for tonight! I have a few new projects in the works so stay tuned!! It's time to start thinking about Christmas gifts!

Sunday, October 12, 2008

I've been Neglectful!

It's a beautiful fall day here in PA. It's 80 degrees out and signs of fall are everywhere! The leaves are beautiful in their shades of green, yellow, orange and red. Once again, it's been a month since I posted. Not sure why I can't get back into regular posting?!? I've created some of my most favorite layouts this past month and also a few projects that I'll post over the next week. For now, I want to catch up on some of the Sweet Shoppe's From Our Blog To Yours challenges.

FOBTY 9/25 was a typing test. I think I type fairly well. I knew as my fingers hit the keys which words I misspelled - there were 3 of them. Here are my results:

71 words

Typing Test


Wanna give it a try? Typing Test

FOBTY 10/2/08: My favorite fast food has to be McDonalds. I used to eat there at least once a week (either for lunch at work or with the family) however, times are tough and I've been trying to eat healthier. I did have a double cheeseburger late last night (after having some beer while out LOL) but other than that, it's been probably atleast 6 weeks or more since I had McDonalds. I find the more I eat there, the more I crave it. Since I don't eat there regularly anymore, I don't crave it. Strange huh?

FOBTY 10/9/08: This week's FOBTY has us taking an ice cream personality test. Here's how mine turned out:


Your Ice Cream Personality:


You are not a particularly modest person. You're proud of who you are, and you don't care who knows it.


You are incredibly cautious. You rather miss out on something than make a mistake. No one would ever call you wild... but they would call you responsible.


You are a somewhat open minded person, but deep down you're fairly conservative. You don't like trying new things very much. And if you do find something new you like, you stick with it.


You tend to have a one track mind. You prefer not to multitask.


You can be a big dramatic and over the top sometimes. You are bold in every way


Pretty accurate - of course, I don't know what the other results show LOL.... Wanna see what ice cream says about your personality? Link above!

And finally, leaving you with a Hybrid project I did a few weeks ago for Sara Amarie


Credits can be found HERE

That's it for me today! See you soon!!

Monday, September 8, 2008

Good Monday Morning - sharing a few Hybrid projects

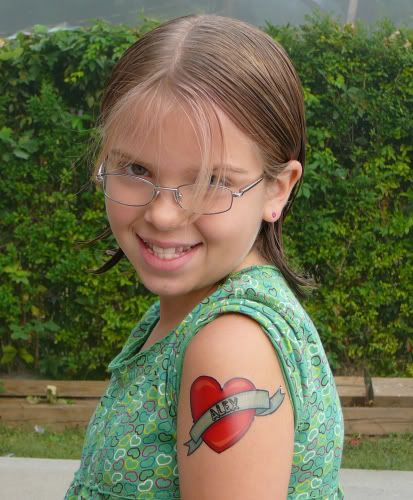
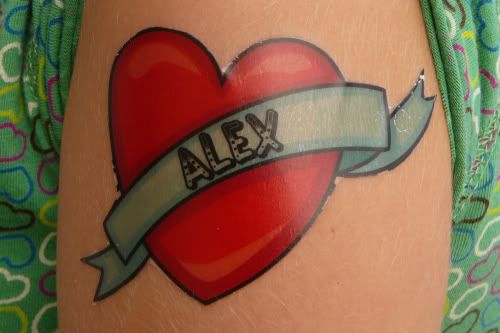
I just have to say that I am having the time of my life (digi-life that is!) right now. I just love playing around and creating new hybrid things. And the designers at the Sweet Shoppe make it so easy and so much fun. First thing I have to share is a tattoo that I created for Penny Springmann's blog using her Chirp kit. It was created using Invent It! Body Sticker Tattoos for ink jet printers.


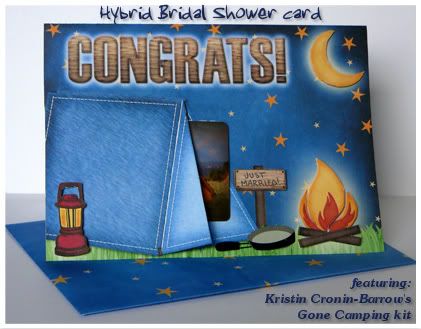
And in August, I created this Hybrid bridal shower card for my niece. She and her husband to be are very outdoor-sy people. The gift card is for a major sporting goods retail store - Amanda informed me that she used the card for a much needed new life jacket for Kayaking.


Credits can be found HERE

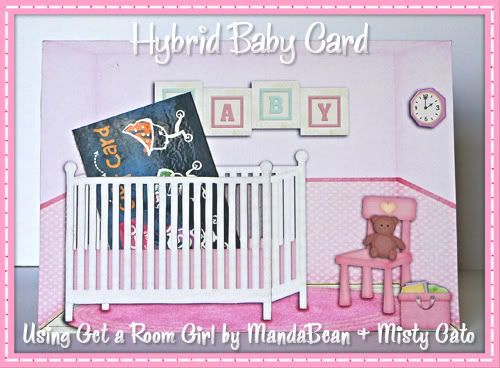
So, after creating the bridal shower card, a light bulb came on and I began planning out a fun baby shower card that could hold a gift card and this is what I came up with:


Credits for the Baby room card can be found HERE

I actually have 2 projects that are in the "planning" stage right now. I have the kits and am working on buying the supplies I need to complete them. I'm on vacation from my full time job this week but am working extra full time this week at my other job for extra cash so I'll have some daytime project time.

That's it for today - catch ya on the flip side!!

Saturday, September 6, 2008

FOBTY fun and a layout

Happy Saturday everyone! Quick posting today for the From Our blog to yours posting at the Sweet Shoppe. It's a "how well do you know your crayons" quiz and I must say that if I would have stuck with my first instinct, I would have done much better! LOL But it was fun to see some of the old names as well as some of the new ones!!!


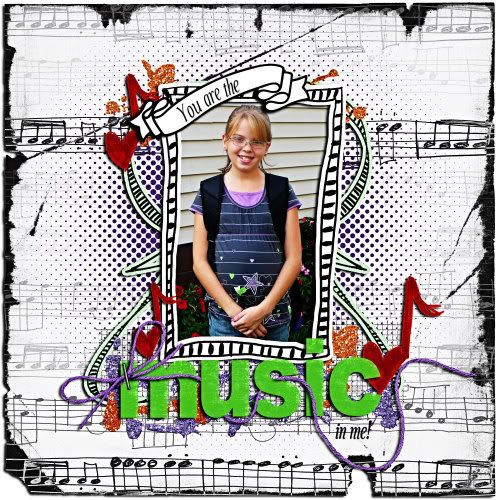
On another note, I just finished up late last night with a layout using Penny Springmann's newest kit "Practice Makes Perfect" and it's on sale right now so RUN and pick it up!!!


Credits can be found HERE

That's it for today - I am off to go find a few things for an awesome HYBRID project I want to do.... stay tuned!!!!

Sunday, August 24, 2008

I'm back and cleaning up the cobwebs that are growing in the corners of my blog!!!

Wow... it's been awhile since I've been here. I can't believe it's almost the end of August already! Kids start school today. I now have 2 in high school and one in middle school. Where is the time going??? I know I've been a busy little bee with all the projects I've done over the last few weeks. Here they are:

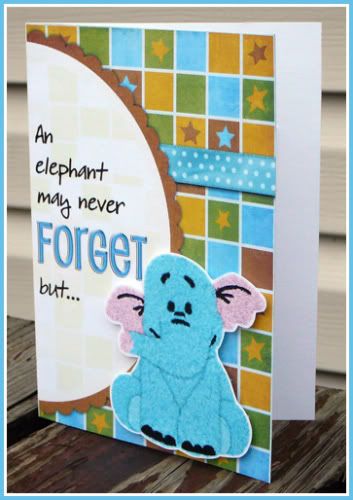
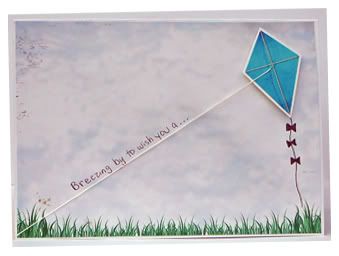
First up - a card I did trying something new. I'm pretty happy with it except for the writing I did on the front. I should have used a font. The kites on the card are all attached using pop dots and the kite string is actual string from a real kite! The kite tails are my attempt at doodling! LOL All in all, I think it turned out cute for my first one.

Front of card:


Inside of card:


Credits: Kites made using Penny Springmann's Summer Fun collection: solids and alpha
Cloud paper by Amy Cheeseman
Grass on front of card is from Penny’s Summer Fun Collection: Hopscotch
kite template by me
the “wood” on the kites was done using the pen tool and then an inner bevel
font: 2peas Barefoot Professor.[/center]


Next up is a 3D card I made for my niece's bridal shower. The tent flap folds back to reveal the sports store gift card that I bought her. She and her future husband enjoy anything outdoor-sy. The lantern, moon, sign and fire are on pop dots. The skillet was an element that was on the shower invite that I received from her.


Credits: Kristin Cronin-Barrow's Gone Camping kit
Grass from Penny Springmann and Misty Cato's Chilling and Grilling kit
envelope template by Bree

and last for today is a Slumber party mini tin invite I made for my daughter to pass out. I found these cute little 4" tins in the $1 spot at Target. I removed the handles, sprayed the tin white and then added my side panels. Each tin will include the party information, mini bottles of nail polish, a nail file, nail decals, small bottle of scented lotion, mini flash light and of course, Chocolate!!!


Credits: MandaBean and Robin Carlton's Stop! Jammer Time kit

And that's it for today! Thanks for stopping by and taking a peek at my latest hybrid projects! Stop back soon and see what else I've done!

Sunday, July 13, 2008

FOBTY - 7/3 and 7/10

The July 3rd FOBTY (From our blog to Yours) on the Sweet Shoppe blog was a "what your fireworks say about you" quiz. Here are my results:


What Your These Fireworks Say About You


You are focused, single minded, and intense.

You don't let others see your intensity often, and when they do, they are quite surprised.


You burn brightly, but you also burn steadily.

You have the endurance to get the one thing you desire most.


Well, I am focused and intense but that is a side of me a lot of people see, esp. at work. As far as this part "You have the endurance to get the one thing you desire most", I would label it more as determination!! LOL....

The July 10th FOBTY posting was to blog about our favorite vacation spot or dream spot. I already blogged about my dream spot - Pompeii and Greece a month or so ago for the FOBTY, so this time I'll go with my favorite vacation spot.

We don't really do vacations in my house because my husband can't (read "WON'T) be away from his job. But I've started traveling and started the kids traveling. My favorite vacation spot is Ft. Myers Beach. It's sunny and warm and the kind of beach that you can just sit on all day and enjoy life! Although I need a beach chair, an umbrella to sit under (because I burn so easily), a good book/magazines, and something cold to drink. That is my favorite type of vacation!!!

Well, that's it for today. Hopefully I'll have some layouts or projects to post later this week. Have to go get Andrew ready for his trip - he leaves Tuesday evening.

See you all later!!!

Wednesday, July 9, 2008

Who says we're too old to play with paper dolls?? Whimsical Hybrid Card

Wow! I can't believe it's already July 9th! The summer is almost half over! Next Tuesday, my 15 year old will be flying alone to spend 3 weeks in Ft. Myers with my sister and a foreign exchange student. Should be an fun and exciting time for him!

Tomorrow I pick up Taylor from Girl Scout camp! She's been there since Sunday afternoon. Wonder if she's missing her Mom like her Mom is missing her??? I hope she is having a great time and will have some great memories to hang onto.

Last night I finished a Hybrid card that I started Monday night. It just wasn't working out like I envisioned until I had a brainstorm (anyone smell unexplained smoke Monday night? LOL).

At the beginning of summer, I bought a "Paper Fashions Fancy - Design your own Dresses" kit at Michael's for Taylor to work on when she was at her Grandparents while I worked. I gave her strict instructions that she wasn't to bring the kit home - it was only for Grandma's house. Well, I decided to go get the kit (and the cute little wire hangers that were included in the kit) and re-create the dress that wasn't working. The kit has great stencils that you can use to design your own clothes and accessories. Here's what I made with the kit:


Credits can be found here

And here's what the craft kit I used looks like:


My daughter LOVES playing with this and designing her own fashion clothing - she's 11. So worth the money I spent on it (although I had to use a 50% off coupon and only paid $12) and the $9.99 on the refill kit. And now I've found a way to play with it too!! I know as soon as Taylor sees my card, she'll be using her Design your own Dresses kit in a whole new way!!!

That's it for today - just remember to always keep on creating!!

Saturday, July 5, 2008

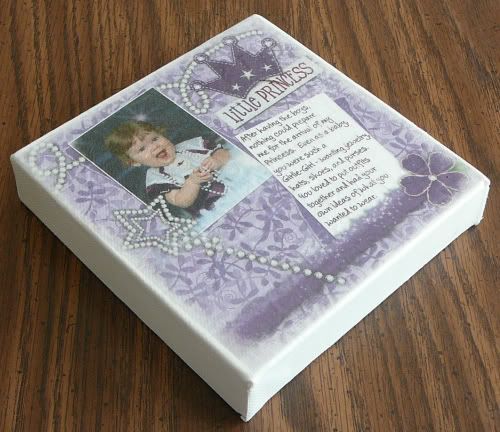
Tissue Paper Stretched Canvas Hybrid Project

These Tissue Paper Canvas project instructions were originally written by me on March 27, 2007 for a monthly project in a digital scrapbooking newsletter. These instructions were posted in several forums across digi-land, however, due to sites changing hands and the closing of sites, I felt it was time to bring my project instructions home and post them on my blog.


You can click on the preview for a look at the full sized, better quality photo.

Stretched canvas can be purchased at any craft store, art supply store or online from sites such as www.amoebaartshop.com. A google search will bring up other sites. Stretch canvas resembles Aida cloth (cross stitch material) which has been stretched over a wood frame for a 3 dimensional look. Stretched canvas is available in many different sizes from 4 x 4" to 12 x 12" and also can be purchased in rectangular sizes such as 5 x 7" and 8 1/2 x 11". The depth (or sides) of your canvas can also vary from 3/4" thick to 3" thick. For my project, I used 5x5" square stretched canvas with a 1 1/2" side. My canvas cost just under $4.

Once you have purchased your stretched canvas, you will need to measure the canvas surface. I know, I know... I know what you're thinking, "why did she measure the surface when she just said she bought a 5x5" canvas?" Just trust me when I say "measure twice, so you only have to print ONCE!" My canvas when measured was actually 5 3/8 x 5 1/2". Each canvas may measure a little differently than the previous one. You will need to convert your measurement into decimals in order to accurately resize your layout for printing.

Now, you have the daunting task of picking which layout you want to use for this project. To me, that was the most difficult! Since my stretched canvas was 5 3/8 x 5 1/2" which equals 5.375 x 5.5", I resized my ORIGINAL full sized 300dpi layout to 5.25 x 5.375" maintaining my 300dpi. (I used an online fraction to decimal converter to figure out my calculations. A good one can be found at www.webmath.com.) I did not want my printed layout extending over the edge of the canvas. In your program of choice, open a new image 8 1/2 x 11, 300dpi, and filled white. Copy and paste your resized layout onto this new blank image. Center your layout. This is an important step as it allows you to control the placement of your layout during printing. **Always do a draft test print (using grayscale to save on ink)on paper before doing your final print**

Next, we need to print our full color layout. We're not going to print on regular computer paper or even on cardstock. We are going to print our layout on tissue paper. To do this, you will need white tissue paper. Simply cut a piece of tissue paper about one inch smaller than the size of your computer paper. Lay the tissue paper on top of the computer paper you just test printed on and smooth it out. Use small 1 inch sections of tape (I used masking tape on one and scotch tape on another) to tape down all edges of the tissue paper. Completely tape down one side of your tissue paper before moving on to the next until all four sides are taped down. Do your best to have no wrinkles or bunching of the tissue paper. All edges of the tissue paper MUST be taped down and all tape MUST be flat.


**One of Janie (scrapastrophe) hints was to tape the sides of the tissue onto the back of your master paper so that you can print a little bit more on the edges and it gives a bit more tissue to play with. This will allow you to print up to an 8 x 8 sized tissue paper layout.**

Place your taped tissue paper in your print tray and print your layout using your printer's best print option. Allow your printed layout to sit for 24 hours before continuing with this project.

After your layout has cured for 24 hours, gently remove the tissue paper from the computer paper and cut around your tissue paper layout.

Again, check the size of your printed tissue paper layout on your canvas. Trim edges as necessary.

Position your tissue paper layout on your canvas. Lift the right half of your layout up and apply a thin coating of Matte finish Mod Podge glue on that half of the canvas with a foam brush. Very slowly roll the tissue paper back in place starting in the middle and working to your right. Go slow - gently touching and dabbing the tissue paper as it settles on to the glue. DO NOT press and RUB - this will smear your ink and may rip your tissue paper. Repeat for the left side of your layout. Air bubbles can be removed by poking the tip of a needle or pin into the bubble and then flattening the bubble. Allow to dry for 2 hours.
**I've also successfully used Plaid's scrapbooking glue pen with the dauber tip to adhere my layout to the canvas using the same technique as above**

Using a foam brush, apply several thin coats of Mod Podge glue over the entire surface of your layout and canvas making sure to get the edges of your layout. Allow to dry 30 minutes between coats of Mod Podge. Once completely dry, apply 2-3 layers of a clear acrylic sealer with a Matte finish, allowing each layer to dry completely.

These look GREAT displayed in a plate stand or hanging on a wall. If you have any questions about the instructions or would like to show off your creation using my instructions, please email me at wildblueeyez at comcast dot net. I'd love to see what you've done!!!