Wednesday, January 28, 2009

Candy Bouquet Instructions

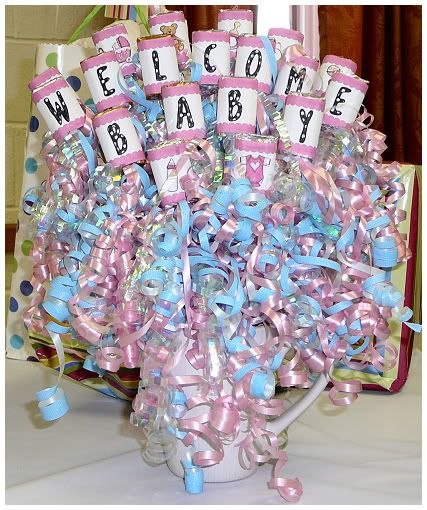
These candy bouquets are so easy and fun to make. My daughter actually made one with my supervision as a class demonstration project when she was in 4th grade. I've made them for Valentine's day, birthdays and baby showers.


Here's my supply list and how I make mine:

Supplies:
-Regular computer paper or sticker paper (I always use sticker paper)
-Bag of Hershey's miniature candy bars
-Bamboo skewers (found in the kitchen supply aisle at Kmart, Walmart, etc near the
spatulas/measuring spoons approx. $2.00)
-Mug or container of your choice (mine is from the dollar store)
-Floral Foam block, cut to fit snug in your mug (purchased mine from a dollar store)
-Low temp Hot Glue
-Shredded paper to cover foam in mug (purchased mine from a dollar store)
-Pre-curled ribbons (Like you attach to gifts - I bought 3 curled gift bows for a $1
at a dollar store), in my baby sample above, I used 19 of them.

Assembling instructions:
1. Start with a 2.57" x 1.51" canvas, 300dpi. Odd size, I know, but trust me, this
is the size of my wrappers. Create your candy wrappers to your liking. I
create some sort of borders on my wrapper and save that one as my "base". Then
I add an alphabet letter to the base and save as wrapper ______ (insert letter
here). Delete that layer and add your next letter to the base. Save as wrapper
_____ (insert next letter here). Do the same with any elements you want on your
wrappers.
2. Open an 8.5 x 11 300dpi canvas. Position as many of your wrappers on here as
you can to create a full page of wrappers for easier printing. I used full
sized label paper to print on.
3. Print and let sit for about 15 minutes. Cut labels and wrap each candy bar.
Center letter or image on front of mini candy bar and then wrap edges to the
back of bar. If using paper, wrap label around candy bar and tape to the back
of bar. Foil edges of mini candy bar will be visible when the candy bar is
wrapped.
4. Working quickly and on one candy bar at a time, apply a stripe of hot glue down
the middle of the back of the candy bar. Start at the top of the backside of
the candy bar and apply the glue to the bottom on the backside of the candy
bar. Lay a wooden skewer in the glue while it's still hot. Position the wooden
skewer so that the tip is very close to the top of the candy bar, but not
showing at the top. This will give it a better hold when it is put in the mug.
Let dry completely.
5. Fit your styrofoam block/shape to your mug/container. You will want a snug
fit. I had to cut additional wedges of foam to make it fit snugly. Apply some
hot glue to the foam and cover the foam with some shredded paper, if you
desire. I did half of the surface, added paper and then did the other half.
But don't use too much or it will be hard to push your wood sticks into the mug.
6. Hot glue your curling ribbons to the bottom of each candy bar in front of the
stick. (Play around a little to see how you want the ribbon to look before hot
gluing it in place) I put curling ribbon on each skewer. Allow to dry.
7. Arrange your candy bars in your mug/container. Start with your middle row and
center. See photo for reference. Some of the skewers for the front of your
arrangement will need shortened for placement. I did not shorten any of the
skewers for the candy bars at the top of my arrangement.

You can download my supply list and instructions HERE

Enjoy! And most of all, if you create a candy bouquet, please drop me a line so I can see yours!!!

Monday, January 26, 2009

I've been tagged!!! and a new layout that I LOVE!!!

So, I get this sweet little PM from my friend and fellow Penny Springmann CT Christine(my4boys) and I get all excited to see what my fellow Steeler lover has to say.... and she TAGS me!!! But this is a fun little game I've been tagged in! I saw this posted on a blog a few days ago but totally forgot about it. Here's the tag:

Go to your photos folder in your computer.
Go to the 6th folder of photos.
Go to the sixth picture in that folder.
Put the picture on your blog and description of it.
Invite six friends to join the challenge.
Link them in your blog and let them know they have been challenged

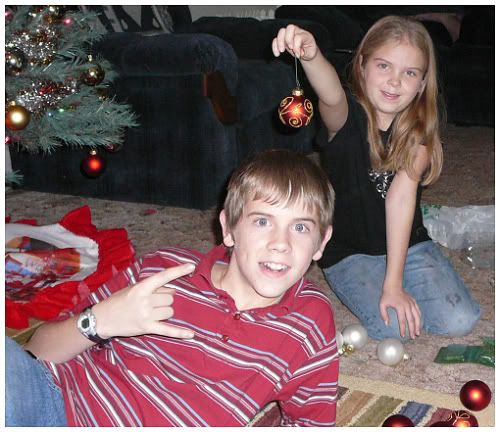
Here's my photo from this fun little game:


This photo was snapped obviously as my two youngest were decorating the Christmas tree in 2007. I love the little hand signals my Andrew does when he has his picture taken. LOL

So, let's see who I can tag and see what photo is their 6th photo in their 6th folder....I'm tagging:

Kate Hadfield
Kris
Mothermark
Juli
Tracy
Eve

I did this layout last evening for a blog challenge at The Lilypad. The challenge was about white space and a photo of an inanimate object. This was my entry (which didn't win *pout*) but I LOVE LOVE LOVE how it turned out! Mandy (fellow Penny Springmann CT) commented that she loved how it was tree shaped. I didn't even realize it until she pointed it out! and funny how the star ended up on top of the tree shape!!!


Credits are HERE

And that's it for me this chilly PA Monday. Catch you later!

Saturday, January 24, 2009

It's been a week??? Really???

I can't believe it's been a week since my last post! Which also means it's been a week since I scrapped or created anything. Where did the time go? I've been working hard at the gym, going almost every evening this past week. I've lost 3 pounds this week. Yay me! But I didn't go last night because I had a project for today for baby shower to work on. I promised my niece that I would make two of my candy bouquets for my nephew's wife's baby shower. I thought I posted my directions for creating the bouquets but I didn't. I'll work on getting these up for anyone that is interested (all 4 of my readers LOL)

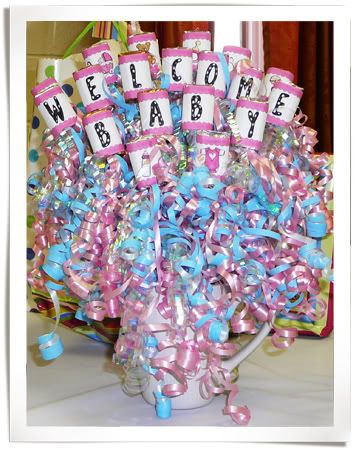
I've been eyeing up Kate Hadfield's designs for a while (I actually purchased my first Kate Hadfield kit just before Christmas) and knew exactly which of her designs I wanted to use for my bouquets. Here's the candy bouquet I created:


Here are Kate's designs that I used:


I really wanted to use the polka dotty alphabet but wasn't sure if it would "work" with the pink, white and blue curly ribbon, but I have to say I'm extremely happy how these turned out.

You can be sure I'll be on the look out for black polka dotted curly ribbon to use on my next bouquet - I think it would give it a touch of class!

I have another project in mind using the Baby Girl Doodles, but it's still on the drawing board in my mind.

And last for today, for the Sweet Shoppe's blog challenge posted on 1-22-09, we are to about our favorite cupcakes. I haven't eaten cupcakes in probably 2 years but the last cupcake Taylor and I made were yellow cupcakes with chocolate frosting with sprinkles on top! and boy were they yummy!!! These days, I'm content with seeing all the cupcake digital elements popping up all over the web!

Well, that's it for me for today. Thanks for stopping by!

Saturday, January 17, 2009

Sweet Saturday

The Sweet Shoppe's From Our Blog to Yours offered a challenge to find out what kind of shopper you are. Here are my results:


You Are a Reluctant Shopper


You really don't enjoy shopping. For you, it's just another chore.

You approach shopping systematically. You research what you're going to buy and come prepared with a list.


Of all the types, you are the most likely to not buy things you don't need.

You try to de-emphasize stuff in your life. You find shopping and buying things to be a rather empty experience.


Yeah, this is me. I've turned into a real frugal shopper - only get what I need and I really have to think hard as to do I really need it?

I have a layout to share today too - it's for the challenge at digidares.com. This week's dare was:
Must use kraft paper somewhere in your layout
Must use at least one b/w photo
Must have the lyrics/part of the lyrics or words from the song/quote/poem somewhere on your layout

and here's what I came up with - uses Penny Springmann's Perfect Pair with Brandy Designs called Sweetest Heart.


The kit can be purchased here and thru the 20th, there is a Free with Purchase gift (after the 20th, you'll have to purchase the add-on):


The layout also uses a bunch of other Penny products.


Credits listed HERE

Well, I'm off - have to go get ready for a wedding this afternoon. It's a cold day in PA for a wedding but it's the daughter of a very close friend getting married and a blizzard would NOT keep me from attending!!!

See you again soon!

Wednesday, January 14, 2009

Sharing a new project

Today was my day to post on Penny Springmann's blog for Hybrid Hump Day. Now, you have to understand that I'm not your typical Hybrid artist (I don't consider myself an artist LOL) so this is not your typical Hybrid project. I've come up with some really different projects over the past year and love that I'm different from most hybrid people. Hopefully those that I CT for love me anyway!!!! LOL

I think this one takes the cake for my most creative project!

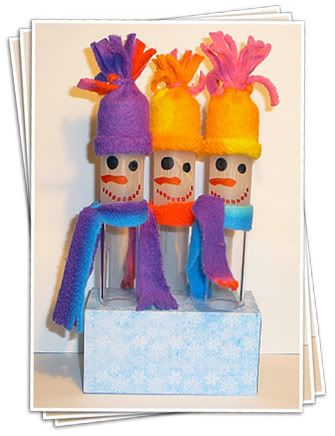
I created these cute little snowmen from Martha Stewart Test tubes (leftover from Halloween), scrap piece of fleece, some thread, a needle, and some other digital hybrid supplies (cardstock, sticker paper, glue dots, etc.)


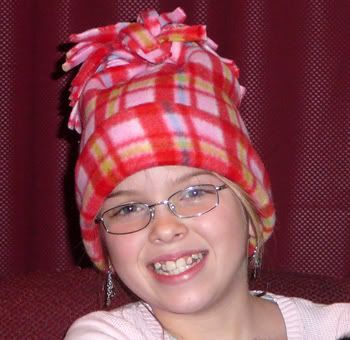
I hand sewed the little hats. I even taught my 11 year old daughter to make them too - in fact, the hat on the snowman in the middle was the one she made. She then asked a few questions on how to make one her size and went about making this for herself:


Now she's taking orders for these from her friends LOL.... my little entepreneur!!!

On a side note: I have continued my trips to the gym to use the treadmill. I went yesterday morning and did my Prevention walking podcast and then went again last evening for another 30 minutes but listened to regular music instead. I didn't get up and go this morning and I really missed going. Am heading there tonight and will go back in the AM.

Thanks for stopping by!
LuAnn

Monday, January 12, 2009

Monday Monday, it was all I hoped it would be...

Nah, I wasn't hoping it would be anything other than the start of a new week but I wanted a catchy title for today LOL. Just a quick post today with a layout I created for a Sweet Shoppe Designs challenge called "Yourself in Photos".

The challenge rules were a MINIMUM of FIVE photos and describe yourself, your personality, your life..something about you with those photos. Here's what I came up with using Penny Springmann's new release Family Tree


Credits here

On a side note, I've been picked to Guest CT for Dawn Inskip in February and can't wait. Dawn's designs are so PERFECT for hybrid projects!! Can't wait!!!

Update on my gym membership - we went to the gym Saturday evening after our membership went live, got up early Sunday morning and went, and I got up this morning and went myself. I'll go again later with hubby. Maybe give the eliptical machines a try!!!

That's it for today. Catch you on the flip side!!!

Saturday, January 10, 2009

today is THE day!!!

Today, hubby and I joined a newly opened health club very close to our house. it literally is a 2 minute walk from my house to the gym. It's a gym that is open 24 hours, 7 days a week. The gym is in a shopping center and is a closed gym. We received our key cards with our membership today. Ken and I are most interested in using the treadmills. Since it was their grand opening, there were no enrollment fees. And I love the fact that there is no contract. It's a month to month auto-pay as you go membership.


It'll be cool to see how this works out because he and I have completely opposite schedules when we're home from work. He's up so early in the morning (like 4am) and is ready for bed at 8pm... can ya blame him??? Me? I'm a genuine night owl. I like to stay up until 1 or 2am. I wouldn't even bat an eye at heading over to the gym at 11pm LOL. I like to stay up late but I still get up at 6:30am to get the kids and myself out to door by 8am.

I know I need to get more sleep. So that I need to work on. Well, time to sign off. Wish me luck as I venture forward - maybe this time will be the time that I get on track and stay on track! Besides, it'll be a great stress reliever for everything that is going on at work as we get ready for our yearly licensing.

Now I got to find something to wear to the gym and find a water bottle!!!!

Thursday, January 8, 2009

It's almost Friday!! Yay!!

Work is so stressful right now as we begin preparing for our yearly licensing. The only thing that helps me keep my sanity is creating. Creating cards and other projects. It's just a great stress reliever! I've created a few projects that haven't made it to my blog so I figured I better get them posted!


Credits: Chriscrap's Princess Story


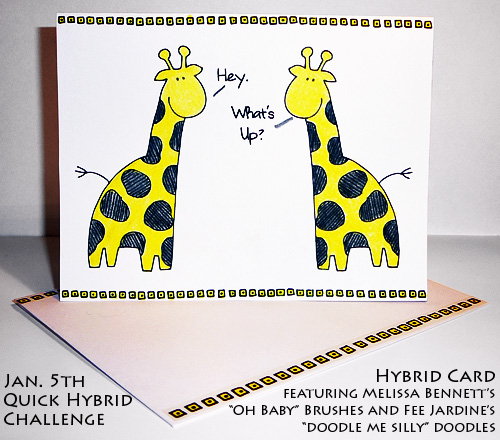
Credits: Melissa Bennett's Oh Baby brushes and Fee Jardine's Doodle Me Silly doodles
I created my card, printed the card out and used colored pencils to color the giraffe and border. I printed a matching border on clear sticker paper to make the coordinating envelope


Credits: 2 Pager #18 365 day project inspired templates by Penny Springmann and other Penny Springmann designs.


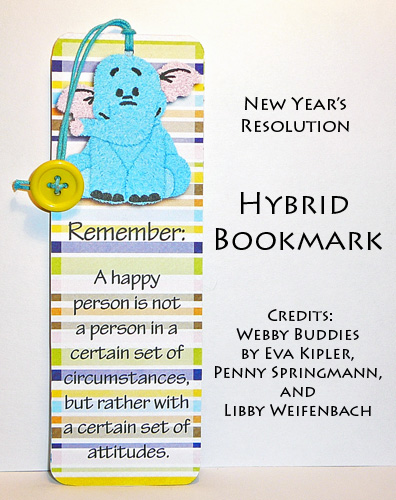
Credits: Webby Buddies by Eva Kipler, Penny Springmann, and Libby Weifenbach

And for the Sweet Shoppe's FOBTY on 1-8-09 - The Snow Test. Here are my results:


Your Snow Test Says You're Independent


You feel like something good will happen to you in the next few days.


You have an amazingly strong work ethic. You are likely to be very successful in life.


You are an independent, individualistic person. You thrive when you're doing your own thing.


Your biggest worry in your life is your financial security. You think about money a lot.


When it comes time to relax, you have difficulty relaxing. You are a bit high strung.

Friday, January 2, 2009

Happy 2009!

Wow...can you believe it's 2009 already? The years keep whizzing by quicker and quicker so you know what that means don't you? Come close and I'll whisper it to you..... closer...... closer..... it means I'm getting old! LOL

Quick post today as I get back into blogging. SSD blog challenge for today is to blog about any goals or resolutions that we may have. A few years ago, I gave up making resolutions because I could never stick to them after the 2nd of January anyway! LOL

But this year, I'm taking a different approach. This year I just want to do things that I love most for a better ME!!! that can mean something simple like reading more books (because reading and crafting run neck in neck for my favorite thing to do!), travelling (which I also LOVE!), to finally losing a few pounds because I want to, not because I need to (although I need to!!! LOL)

How will it all turn out? Guess you'll have to stay tuned to my blog to see my progress!

All right, that's it for this cold PA day! have a good one!

Saturday, December 13, 2008

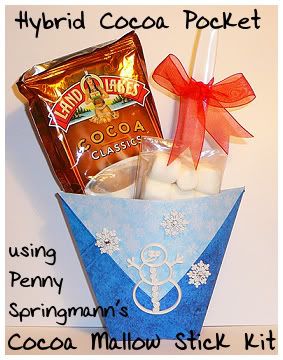
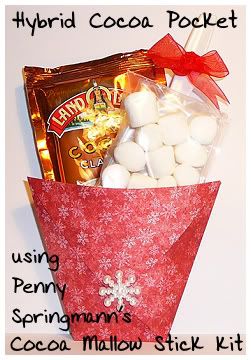
Hybrid Cocoa Pockets

Hi there! It's been a long time since my last post. I've been busy getting ready for the holidays (both Thanksgiving and Christmas). I can't believe christmas is in 12 days!!! I haven't even begun shopping for the kids. Hubby and I are going later this evening and will pretty much finish them in one night. But enough about that, I'm sure you're here to see what I've cooked up...


I came across these little cocoa holders while blog hopping. The idea and inspiration came from Barbara Schram's stamping blog here. Her cocoa packets are AMAZING!!! She was so very kind to post links to the instructions for the paper cup(which I will refer to as the pocket LOL). I think she must have used 12 x 12 sized papers - some were done with double sided papers too because her pockets were bigger than mine turned out.

So, I set about making a digital version and here's how I did mine.

In Photoshop, I opened 2 papers from Penny's Cocoa Mallow Stick kit - the brilliant blue called out to me so I chose it and then did color replacement to change the snowflake paper from neon green to a light blue color. I resized my papers to 8 x 8 and layered them on top of each other on a blank 8.5 x 11" 300dpi canvas.

Now here's where it was a bit tricky. I needed to print one of my 8x8 papers on each side of my white printer paper so that I ended up with a double sided square. I made one of my papers invisible for the first printing. Print on your printers best setting. Allow the ink to dry for a few minutes before you turn that page over and put it back in your paper tray to print on the other blank side. Make sure you feed the same end of the paper into the printer.

**As always, I recommend doing a test print using grayscale (to save ink) to make sure your squares line up back to back when printing. For some reason I had to move one paper just a smidge to one side in order for them to line up perfectly**

In your program, hide the paper layer you just printed and make the other paper layer visible. Print. If you hold your paper up to light, you will be able to see if your squares lined up. Allow ink to dry before handling and folding, otherwise you'll get fingerprints elsewhere on your pocket. *trust me on this!!! LOL)

Cut your square double sided paper. Follow the instrucions for making a paper pocket. (When I folded my points to the opposite side, I touched the point to the edge of the opposite side and then eyeballed the other side to make sure it was going to look right). Once I was happy with how it looked, I made my folds and creased them with my fingers tips.

I (like Barbara) folded my flaps to the outside of my pocket instead of tucking them
in. I used a glue dot under the edge of the diagonal fold and also under the point of the folded down pieces to hold my pocket together. Boo hoo - I was out of my Xyron tape runner!

Embellish as you desire. I used glue dots to adhere my embellishments. Add a packet of cocoa (or baggie of homemade cocoa), some mini marshmallows, and of course a spoon! If my pockets were bigger, I would have tossed some mini chocolate chips and/or some colorful sprinkles in baggies in there too! Jewelry bags would have made for a better presentation.

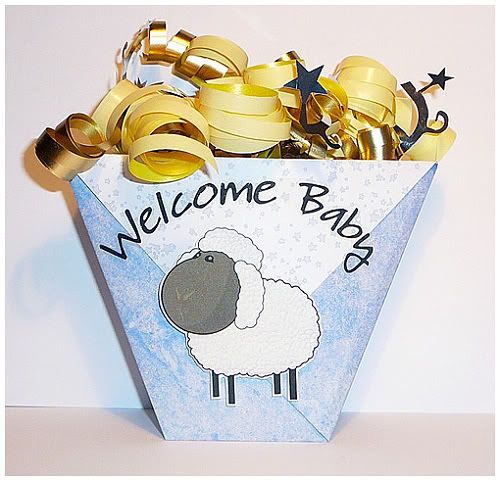
And here's one I did for a baby shower favor - add some shower mints and you're all set!


Wouldn't these be super cute to pass out for Valentine's day??? My daughter asked me if these were Chinese cups - as she knows how to fold paper to make these. So I'm thinking these would be a fun project to get the kids involved in!

I'd love to see your version of these - so drop me a line if you make some!!!

Wednesday, November 12, 2008

A few new cards to add to my "box"

So, since the Sweet Shoppe started with the 52 card pick up challenge, I have been more and more interested in creating cards. I decided to start a box for all my cards and give them to my sister for Christmas. I only have about 10 cards in there so far but what an assortment! I need to work on catching up on the SSD weekly challenges. I also found a really fun "It's in the Cards" challenge at Scrapmatters.com. They provide a template and you go about creating your card. I've only done 2 so far but have a few more in the works!

Here are 2 cards that I created for the It's in the Cards challenge at Scrapmatters:


Credits: Webby Buddies by Eva Kipler, Penny Springmann and Libby Weifenbach
Font is HeatherG by Darcy Baldwin
template by Jaime (ocmath)


Credits: Orange paper by Eva Kipler
Halloween elements from Heather Roselli's Boo Crew Add-on
Green ribbon from Misty Cato's Adorable Me kit
Grass is from Misty Cato and Penny Springmann's Chillin and Grillin kit
template by Dawn (winkasheart)

And last by not least, I subscribe to a really cool stamper blog: http://www.mothermark.blogspot.com/

Each Tuesday, she is having a Teapot Challenge - she will post a photo of a teapot and we are to make a card inspired by the teapot she posts! She has the cutest teapot this week! It's a Mary E teapot! I love the black and white checkered pattern on here - this is probably what I am going to use as my inspiration! Sounds like an interesting challenge! Stop back soon to see my card inspired by this challenge.

Since it looks like she started this back in July, I may have to play catch up and check out the previously posted teapots and see what I can come up with! After all, I only have 42 days 'til Christmas!! Yikes! it will be here before I know it.....

Tuesday, November 11, 2008

Hybrid Baby Shower Favor and Candy Bouquet

Just to back up a bit and give you a little story as to how this came to be...At the beginning of October someone posted on our local Freecycle site looking for any leftover baby shower favors, decorations, etc. Well, I couldn't let someone "collect" various favors for a special time in a new Mom's life, so I emailed the lady and offered to do all of the baby shower favors for her. Had no idea who the ladies were and have never met them. After a few emails about the size of the shower and themes, I went to work. I also offered to create 2 candy bouquets for her to use at the shower in any way she wanted.

Here is the Baby shower favor I created for her - I also wrapped about 25 shower mints in white netting and tucked them in the shoe.


I found the idea online, followed their instructions and then went about "fixing" the first one to look more like a shoe, including the area for the "laces"

The little hanging tag was created using Melissa Bennett's Bundle of Boy kit from the Sweet Shoppe, font is Darcy Baldwin's HeatherG, and saying on the tag says: Little hands, little feet, pure and precious, and oh so sweet!

Here is one of the candy bouquets I made - both were the same.


Credits can be found HERE

I'll be posting my instructions on the Candy bouquet on my blog this week for anyone that is interested!

That's it for today! See you again soon!